> ## Documentation Index
> Fetch the complete documentation index at: https://docs.kobble.io/llms.txt
> Use this file to discover all available pages before exploring further.
# Supabase
> Use your Supabase client with Kobble authentication SDK
## You will learn how to:
* Use Kobble to generate Supabase JWT tokens
* Configure your RLS policies based on your Kobble Users IDs
* Use the Supabase client with Kobble to access your Supabase database from your frontend
Using Kobble with [Supabase](https://supabase.com/) gives you the benefit of using your Supabase database while leveraging your Kobble Customer Portal, User Management, Gateways and more.
Pre-requisites: You need to [set up your Kobble account](/learning/quickstart/setup) before starting this guide.
## Getting started
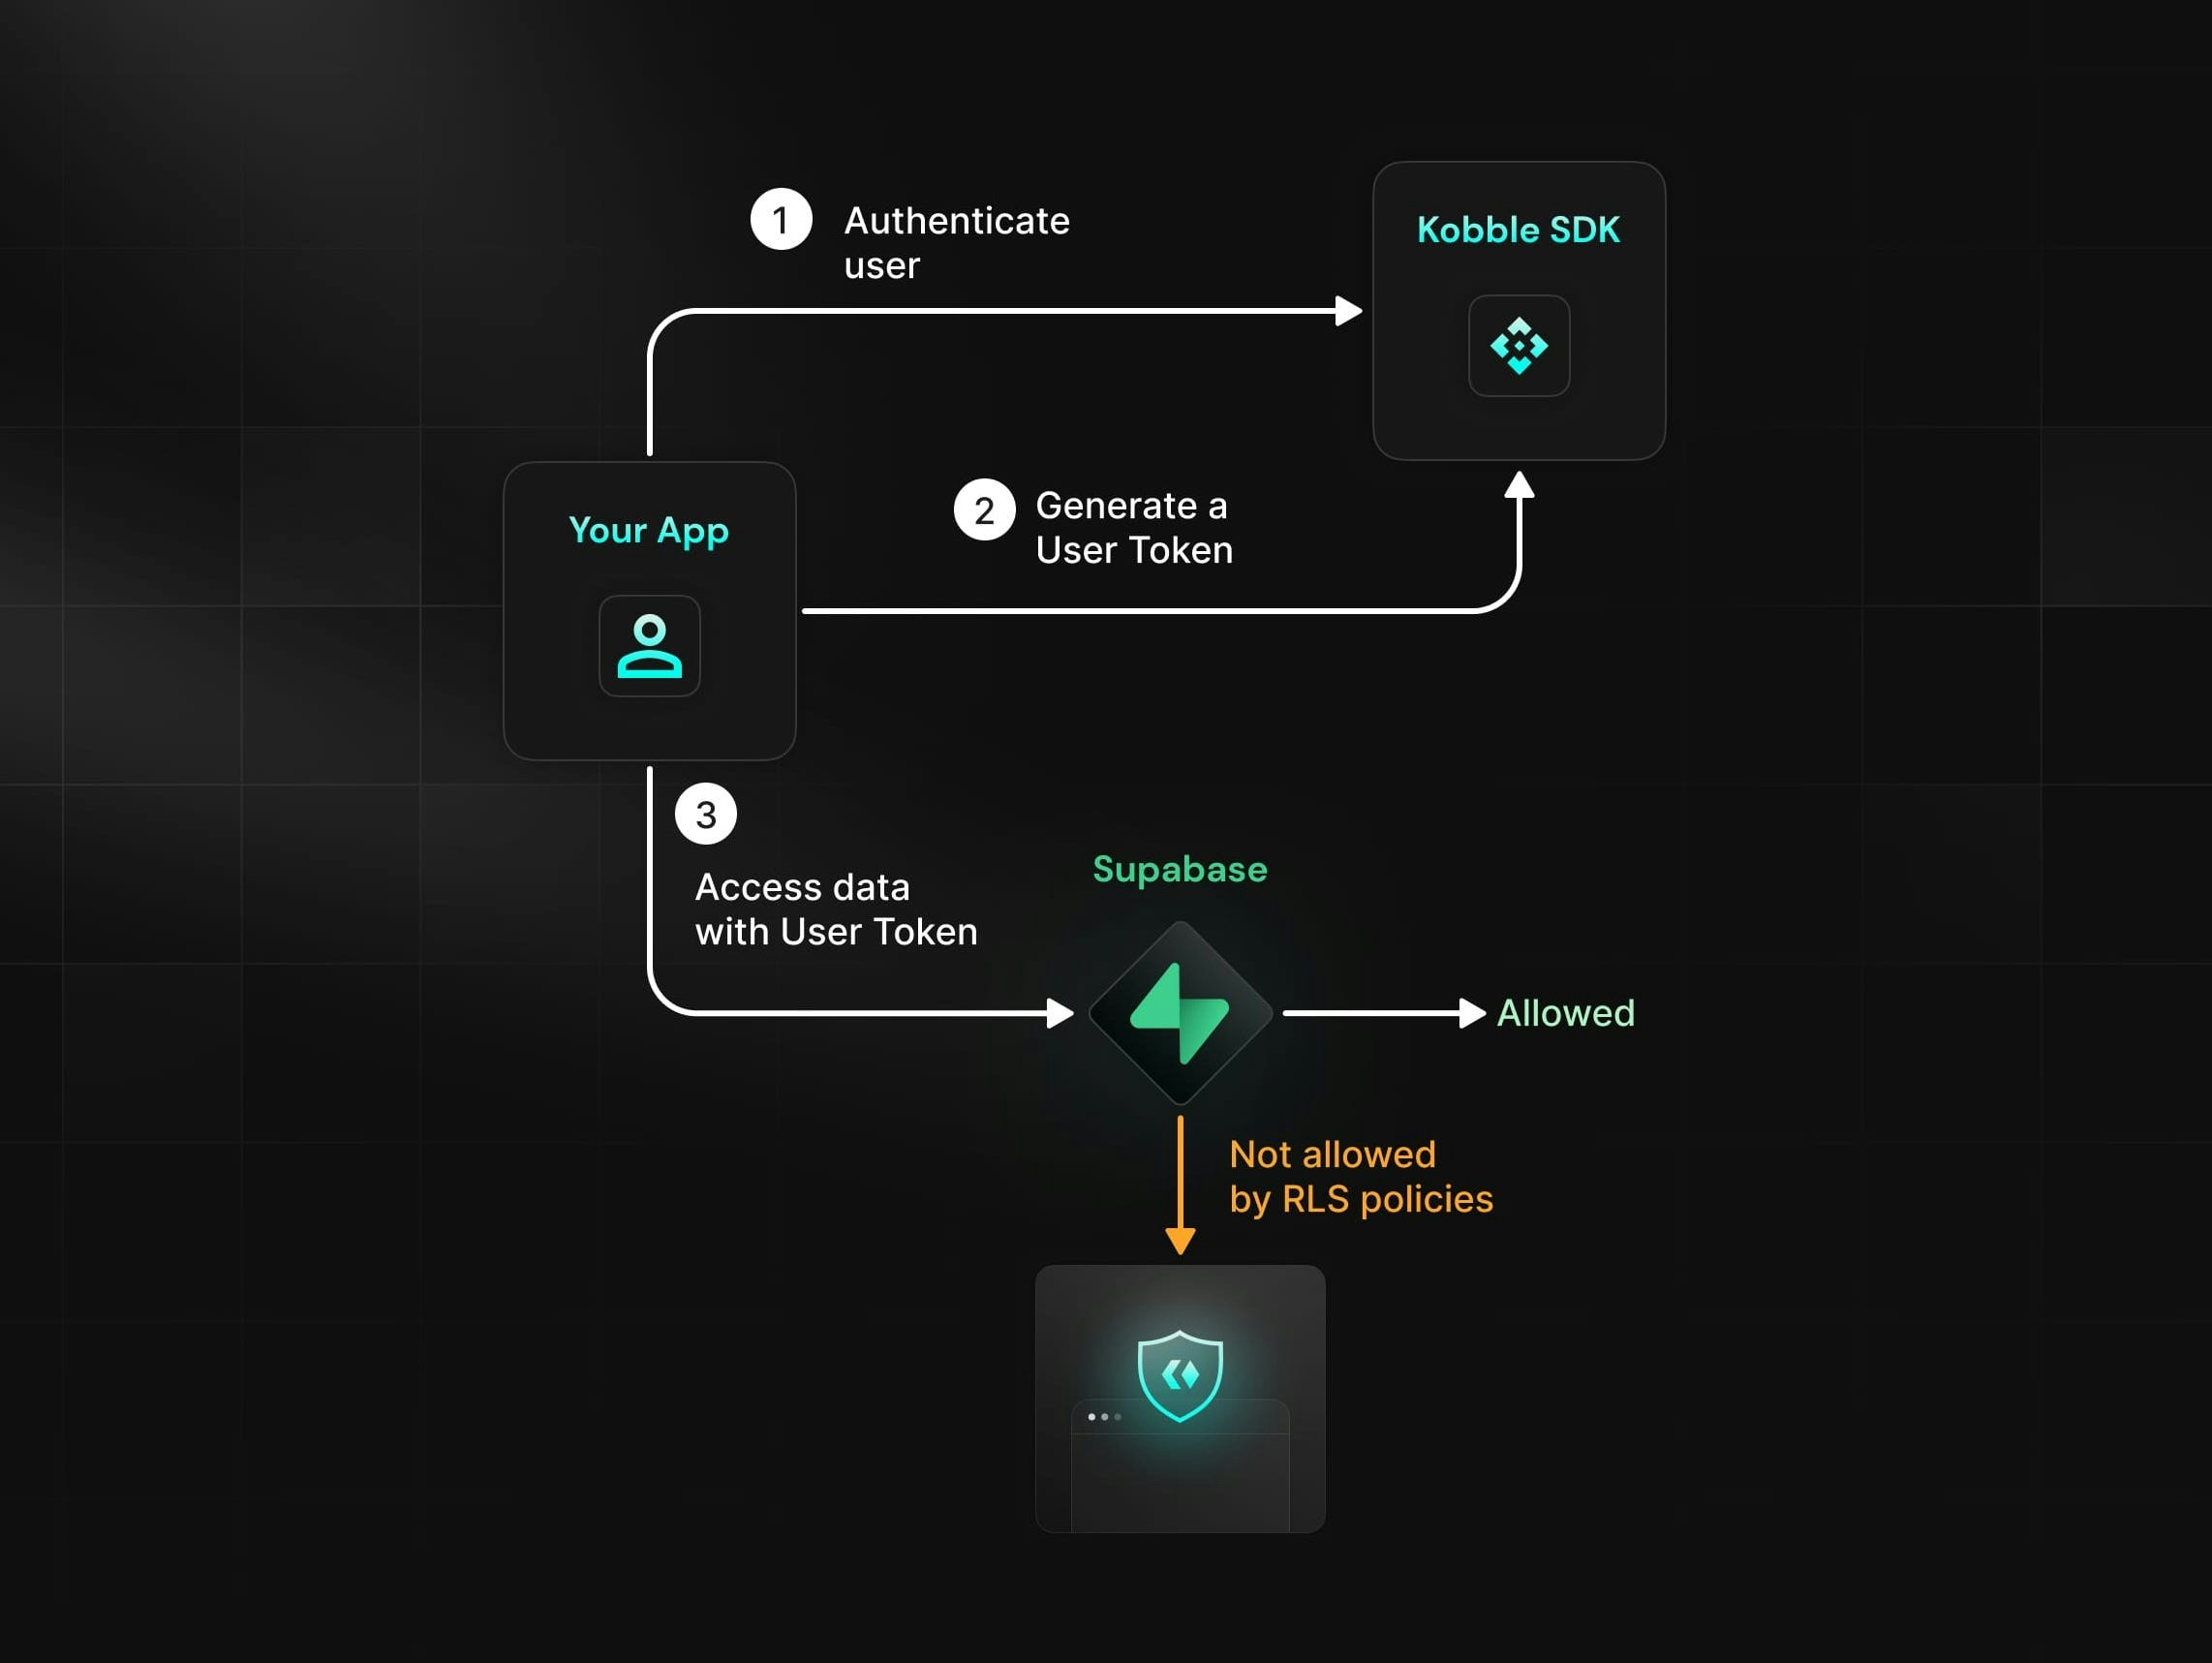
Here's a diagram illustrating how Kobble and Supabase work together in this tutorial.
 Create a function named `request_user_id()`, which will get the Kobble user ID of the requesting user from the request headers.
This will allow you to access the user ID in your RLS policies that we'll configure later.
1. In the sidebar of your Supabase dashboard, navigate to SQL Editor.
2. Select New query.
3. Paste the following into the editor:
```sql theme={null}
CREATE OR REPLACE FUNCTION request_user_id()
RETURNS TEXT AS $$
SELECT NULLIF(
current_setting('request.jwt.claims', true)::json->>'sub',
''
)::text;
$$ LANGUAGE SQL STABLE;
```
4. Select **Run** to execute the query and create our function.
To allow users access to their own data, you need to create a RLS policy that uses the User ID sent in the request.
By storing the User ID in your tables, you can use it in your RLS policies to compare the requester's ID with the User ID in the table.
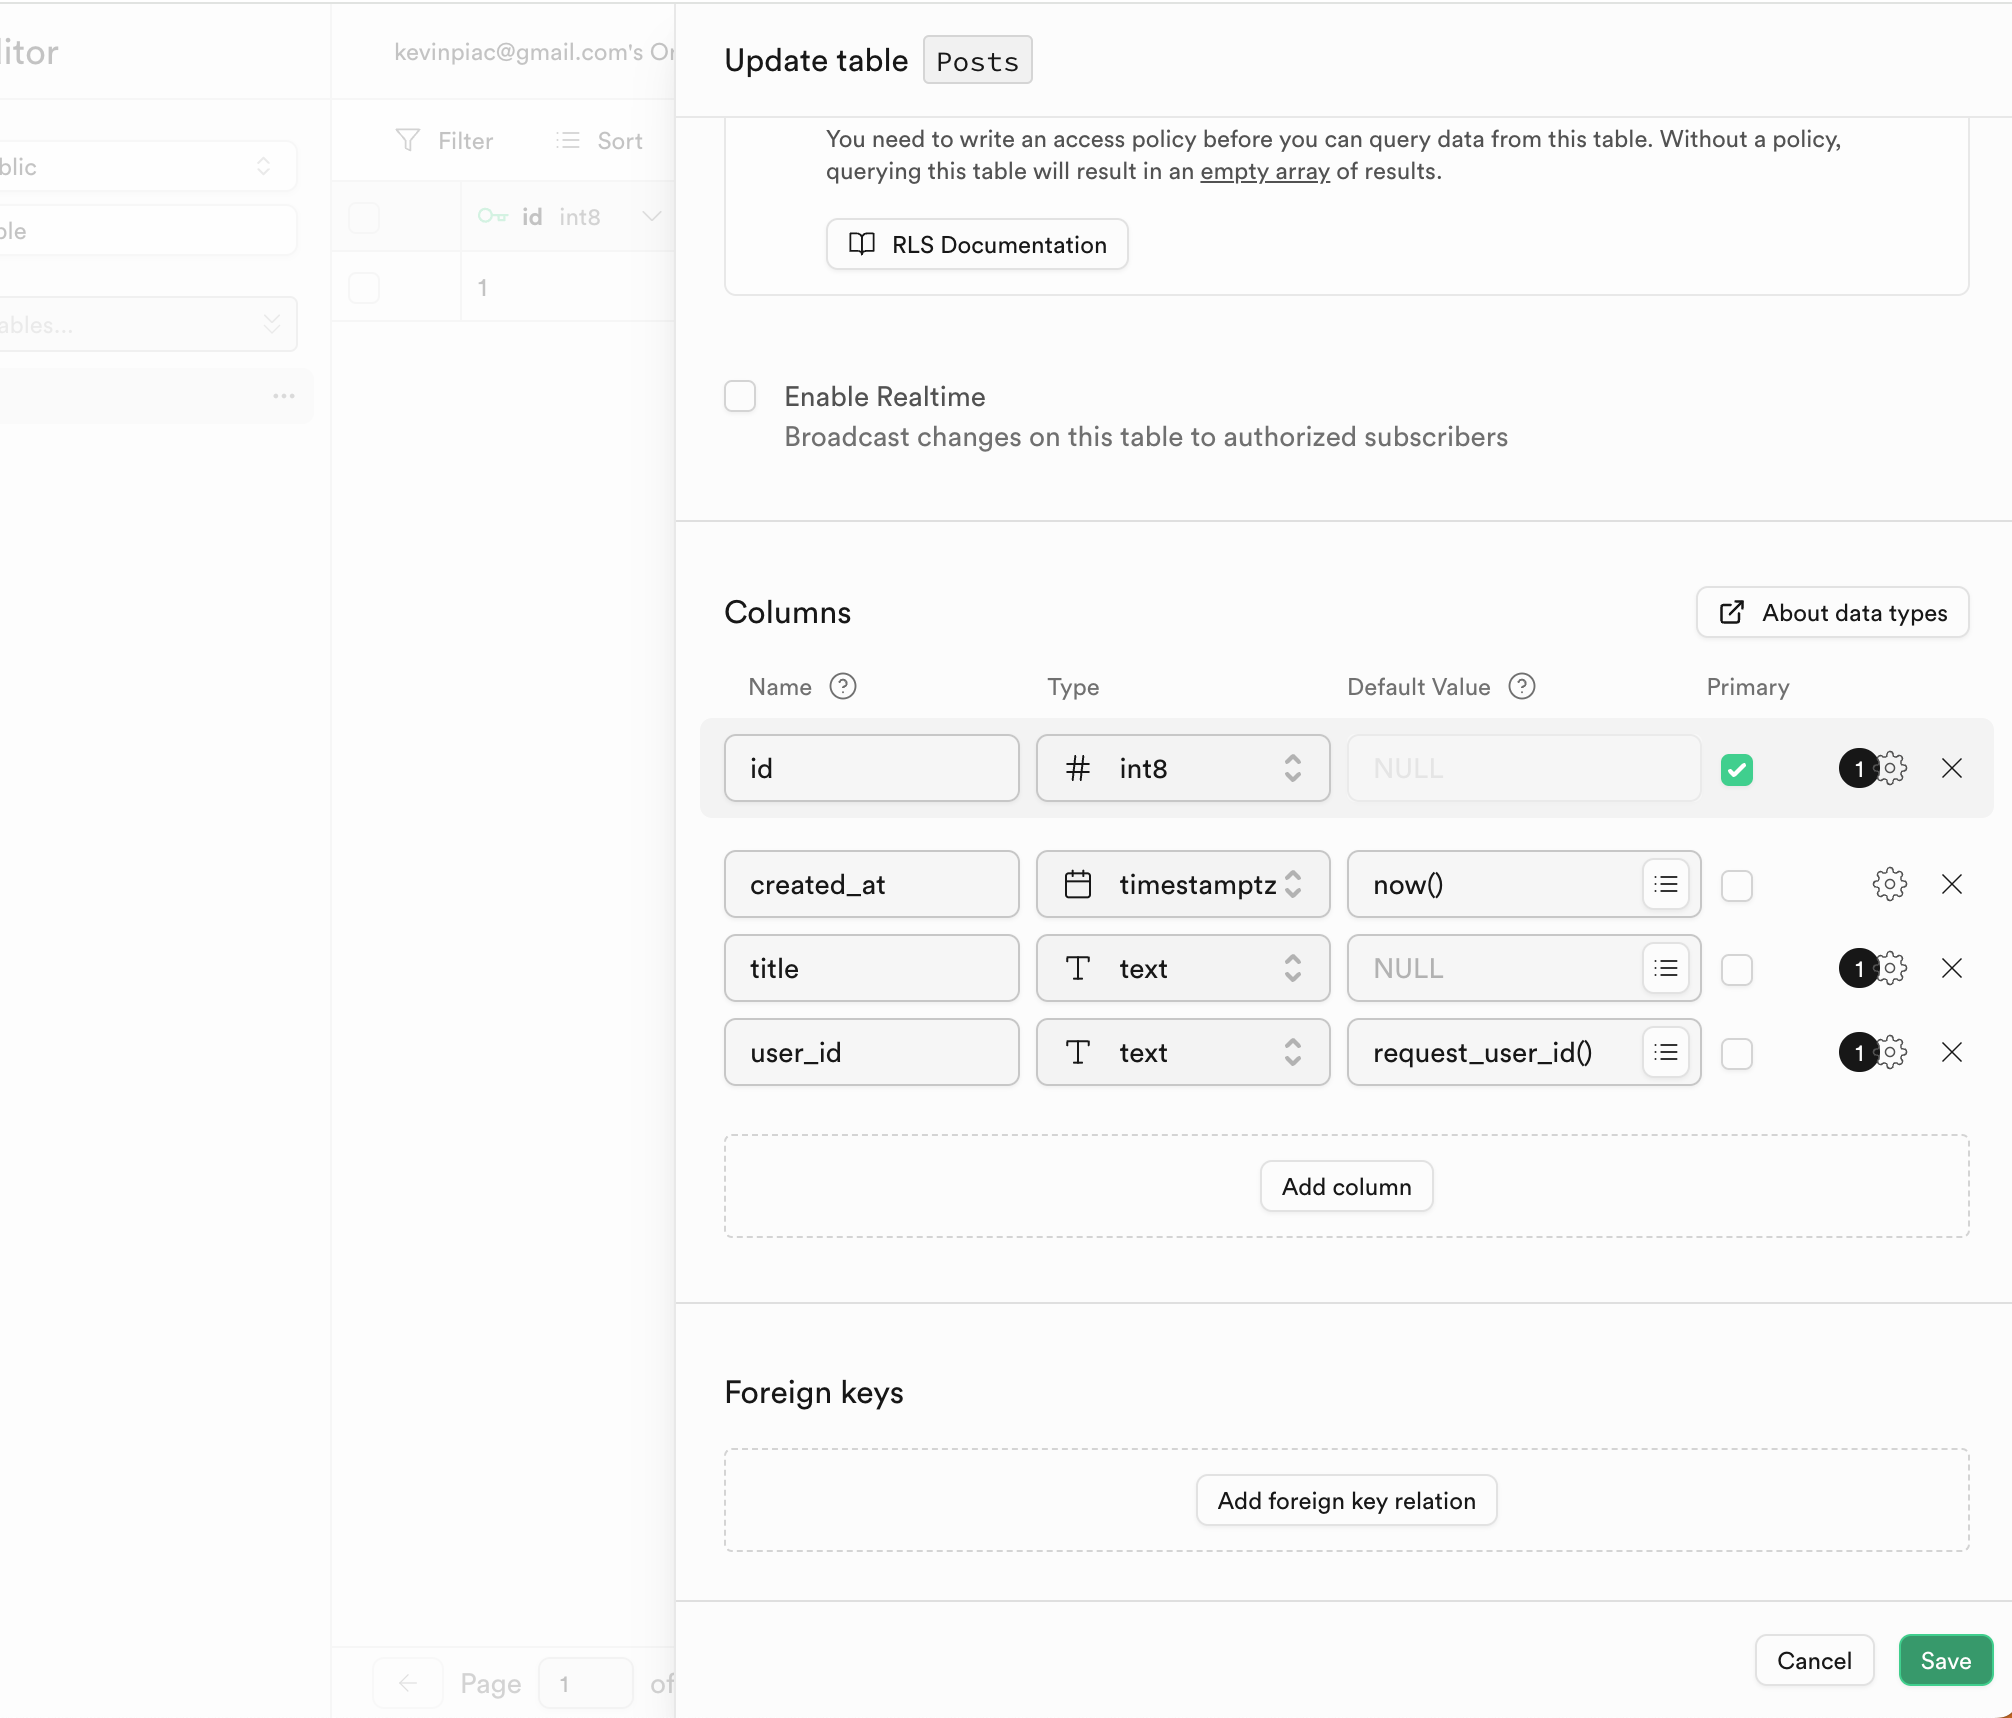
In this tutorial, we'll add a `user_id` column to a `Posts` table as an example.
So we'll assume that you have a `Posts` table in your Supabase database and we want only Post owners to be able to create, update, and view their own posts.
1. In your Supabase dashboard, navigate to **Database > Tables**.
2. Select the table you want to add the `user_id` column to.
3. Click on Insert a column and fill in the following details:
* Name: `user_id`
* Type: `text`
* Default: `(request_user_id())`. This will make it default to the return value of the custom function we've defined earlier. Doing this user's ID will be available to Supabase from the request headers.
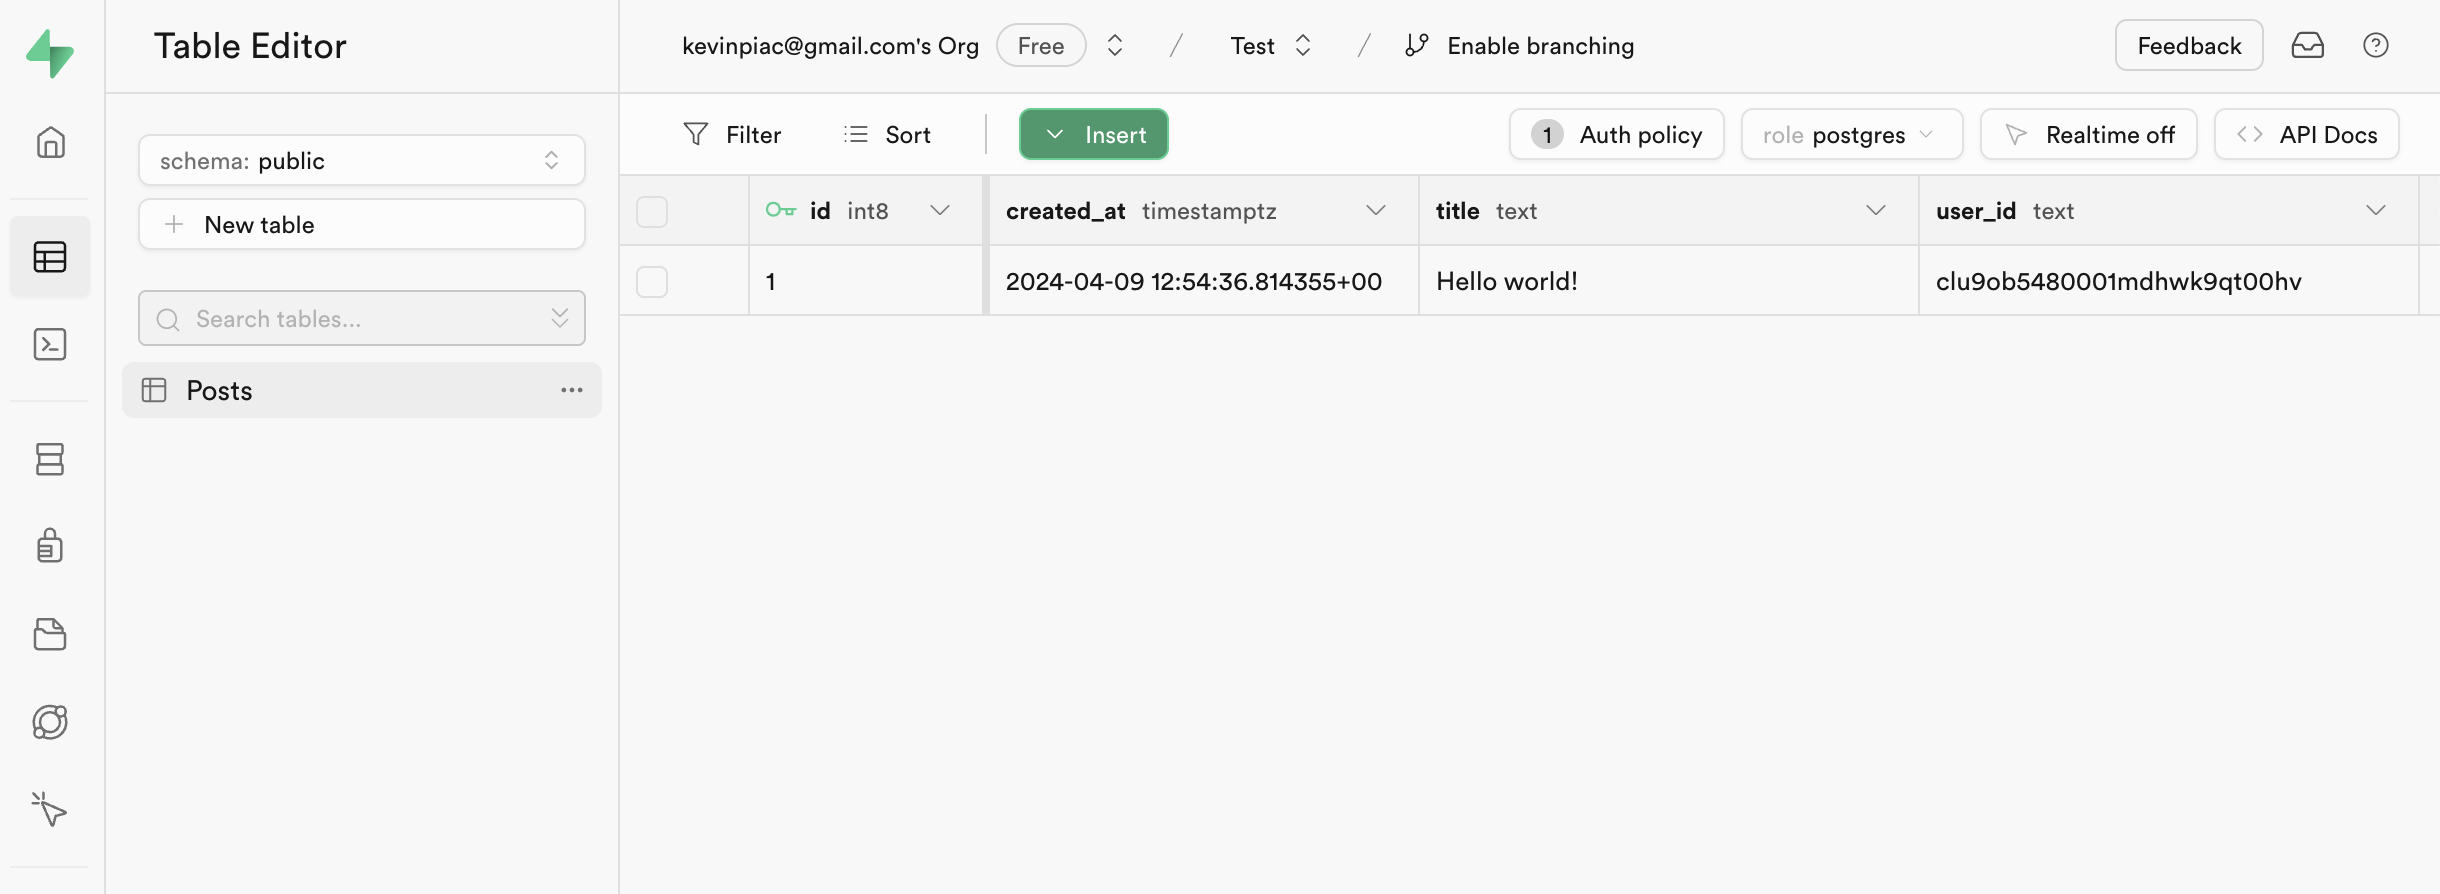
Here's how it looks in our example with our **Posts** table:
Create a function named `request_user_id()`, which will get the Kobble user ID of the requesting user from the request headers.
This will allow you to access the user ID in your RLS policies that we'll configure later.
1. In the sidebar of your Supabase dashboard, navigate to SQL Editor.
2. Select New query.
3. Paste the following into the editor:
```sql theme={null}
CREATE OR REPLACE FUNCTION request_user_id()
RETURNS TEXT AS $$
SELECT NULLIF(
current_setting('request.jwt.claims', true)::json->>'sub',
''
)::text;
$$ LANGUAGE SQL STABLE;
```
4. Select **Run** to execute the query and create our function.
To allow users access to their own data, you need to create a RLS policy that uses the User ID sent in the request.
By storing the User ID in your tables, you can use it in your RLS policies to compare the requester's ID with the User ID in the table.
In this tutorial, we'll add a `user_id` column to a `Posts` table as an example.
So we'll assume that you have a `Posts` table in your Supabase database and we want only Post owners to be able to create, update, and view their own posts.
1. In your Supabase dashboard, navigate to **Database > Tables**.
2. Select the table you want to add the `user_id` column to.
3. Click on Insert a column and fill in the following details:
* Name: `user_id`
* Type: `text`
* Default: `(request_user_id())`. This will make it default to the return value of the custom function we've defined earlier. Doing this user's ID will be available to Supabase from the request headers.
Here's how it looks in our example with our **Posts** table:
 For our example, we want to allow users to create, update, and view their own posts only.
In your Supabase dashboard, navigate to **Authentication > Policies**.
Under the name of the table you want users to have access to, select New Policy.
Open the SQL Editor and paste the following code:
```sql theme={null}
CREATE POLICY "create user post" ON "public"."Posts"
AS PERMISSIVE FOR INSERT
TO authenticated
WITH CHECK (request_user_id() = user_id)
```
We can repeat the same operation as you did for the `INSERT` policy but for to allow `UPDATE` and `SELECT` operations:
```sql theme={null}
CREATE POLICY "update user post" ON "public"."Posts"
AS PERMISSIVE FOR UPDATE
TO authenticated
WITH CHECK (request_user_id() = user_id)
```
```sql theme={null}
CREATE POLICY "read user post" ON "public"."Posts"
AS PERMISSIVE FOR SELECT
TO authenticated
WITH CHECK (request_user_id() = user_id)
```
Note that this is only an example for this tutorial. You can create more complex policies based on your needs.
To give users access to your data, Supabase's API requires an authentication token.
The Kobble SDK will generate this authentication token for you, but it needs your Supabase project's JWT secret key first.
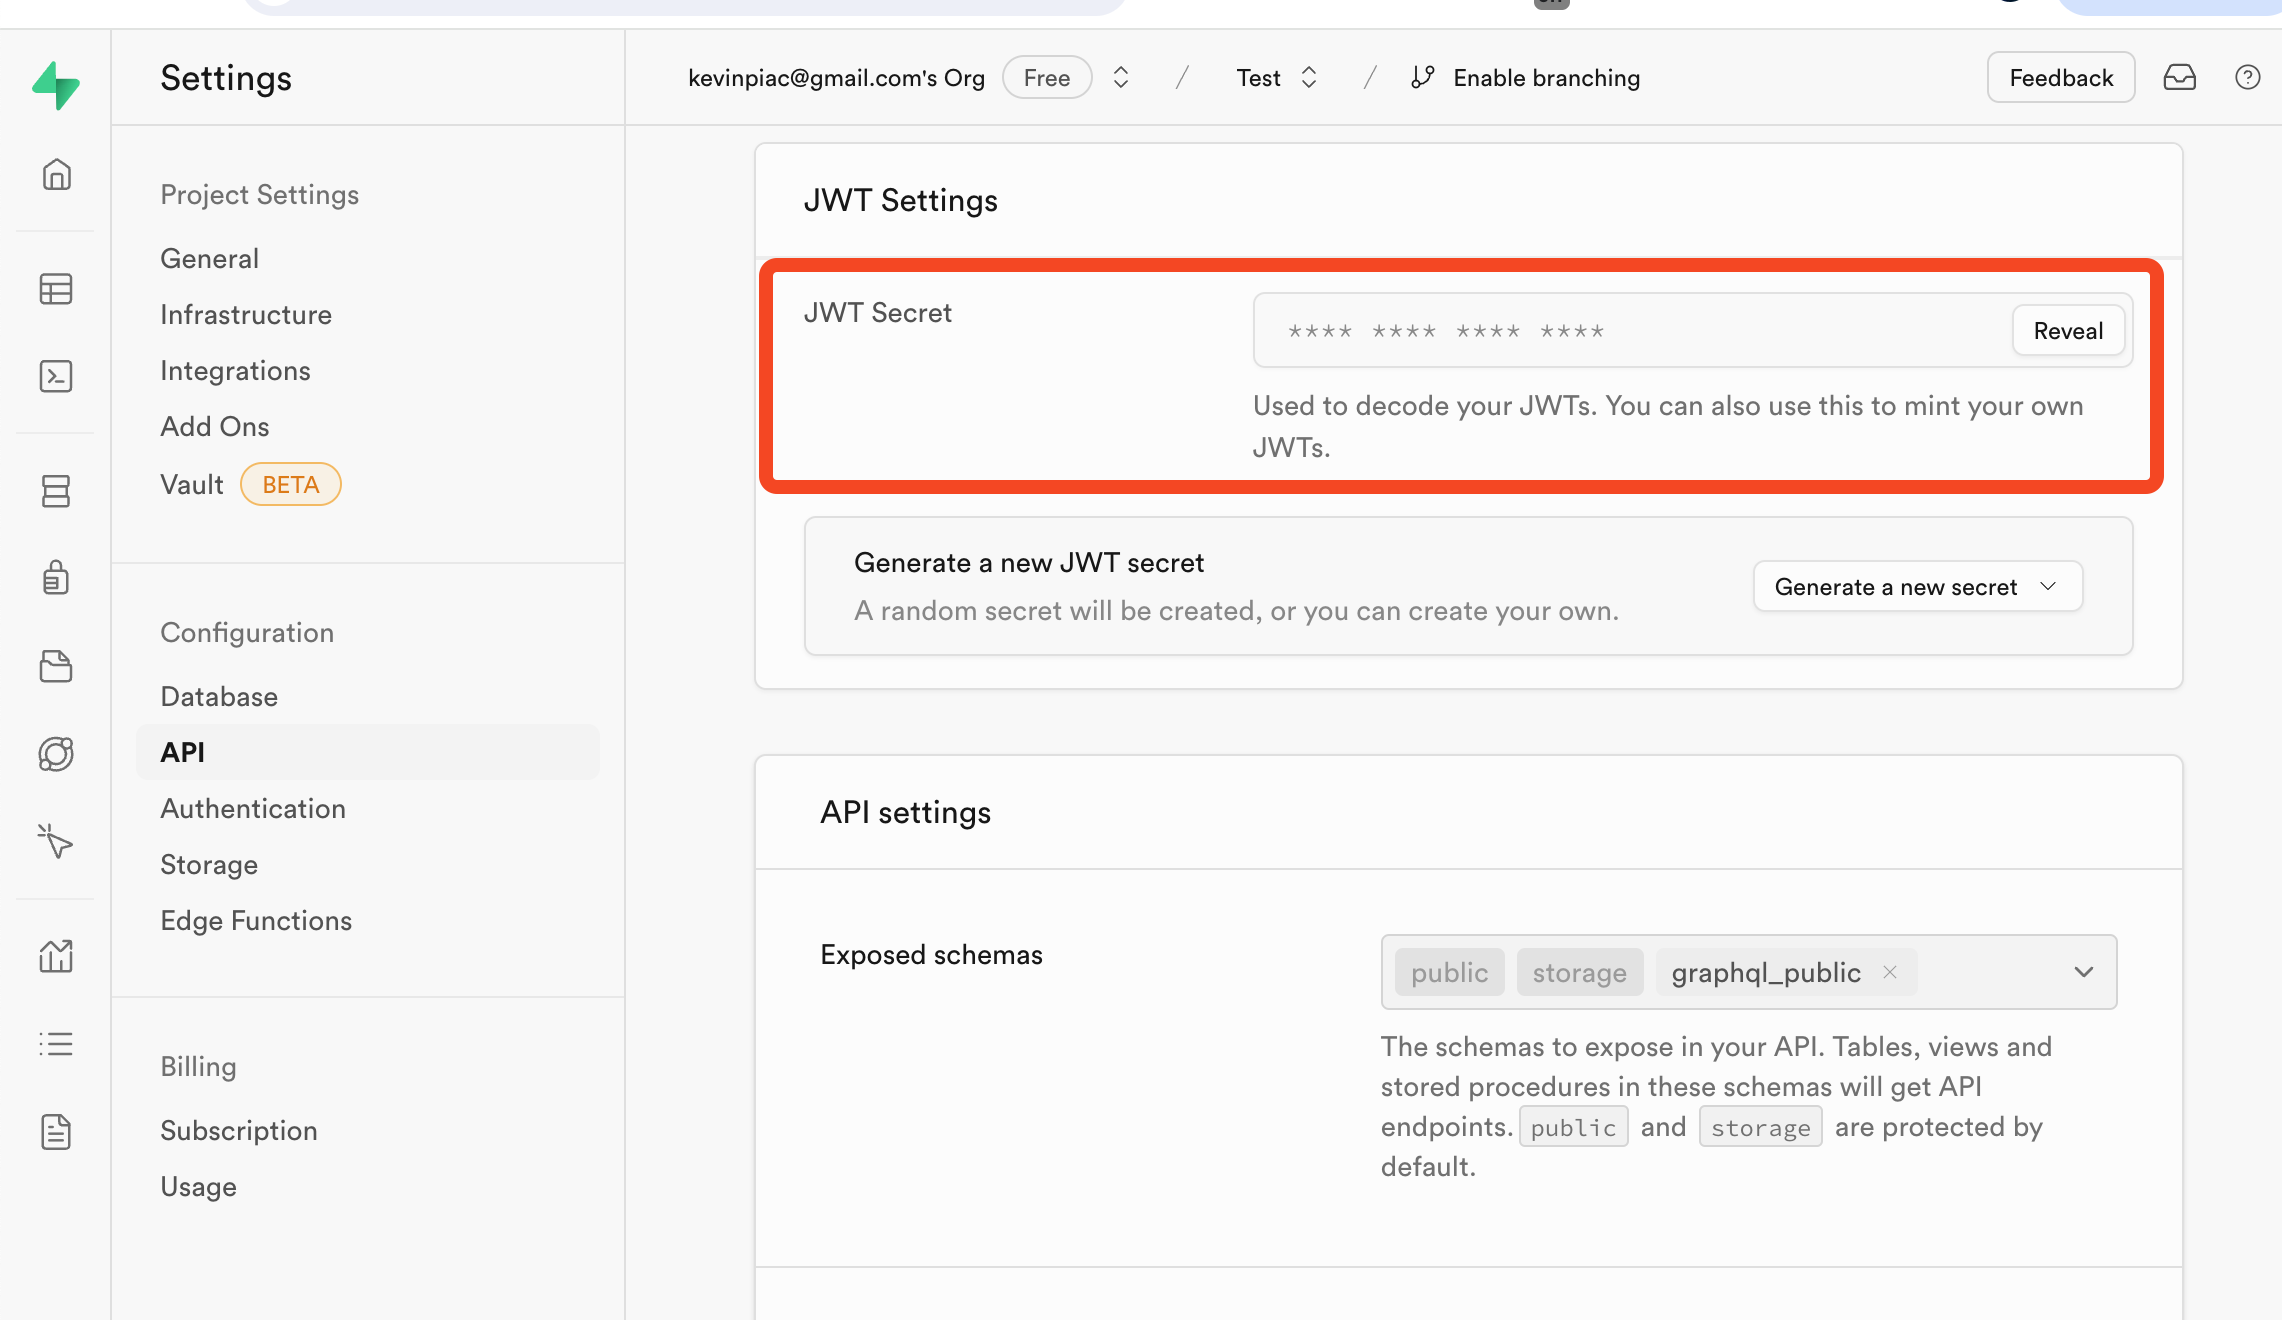
1. Find the JWT secret key in your Supabase dashboard:
* In your Supabase dashboard, select **Project Settings > API**.
* Copy the value in the JWT Secret field.
For our example, we want to allow users to create, update, and view their own posts only.
In your Supabase dashboard, navigate to **Authentication > Policies**.
Under the name of the table you want users to have access to, select New Policy.
Open the SQL Editor and paste the following code:
```sql theme={null}
CREATE POLICY "create user post" ON "public"."Posts"
AS PERMISSIVE FOR INSERT
TO authenticated
WITH CHECK (request_user_id() = user_id)
```
We can repeat the same operation as you did for the `INSERT` policy but for to allow `UPDATE` and `SELECT` operations:
```sql theme={null}
CREATE POLICY "update user post" ON "public"."Posts"
AS PERMISSIVE FOR UPDATE
TO authenticated
WITH CHECK (request_user_id() = user_id)
```
```sql theme={null}
CREATE POLICY "read user post" ON "public"."Posts"
AS PERMISSIVE FOR SELECT
TO authenticated
WITH CHECK (request_user_id() = user_id)
```
Note that this is only an example for this tutorial. You can create more complex policies based on your needs.
To give users access to your data, Supabase's API requires an authentication token.
The Kobble SDK will generate this authentication token for you, but it needs your Supabase project's JWT secret key first.
1. Find the JWT secret key in your Supabase dashboard:
* In your Supabase dashboard, select **Project Settings > API**.
* Copy the value in the JWT Secret field.
 2. Paste it on Kobble
* Open your Kobble dashboard and go to [Integrations](https://app.kobble.io/p/integrations).
* Click on the **Supabase** integration.
* Paste the JWT secret key in the field provided.
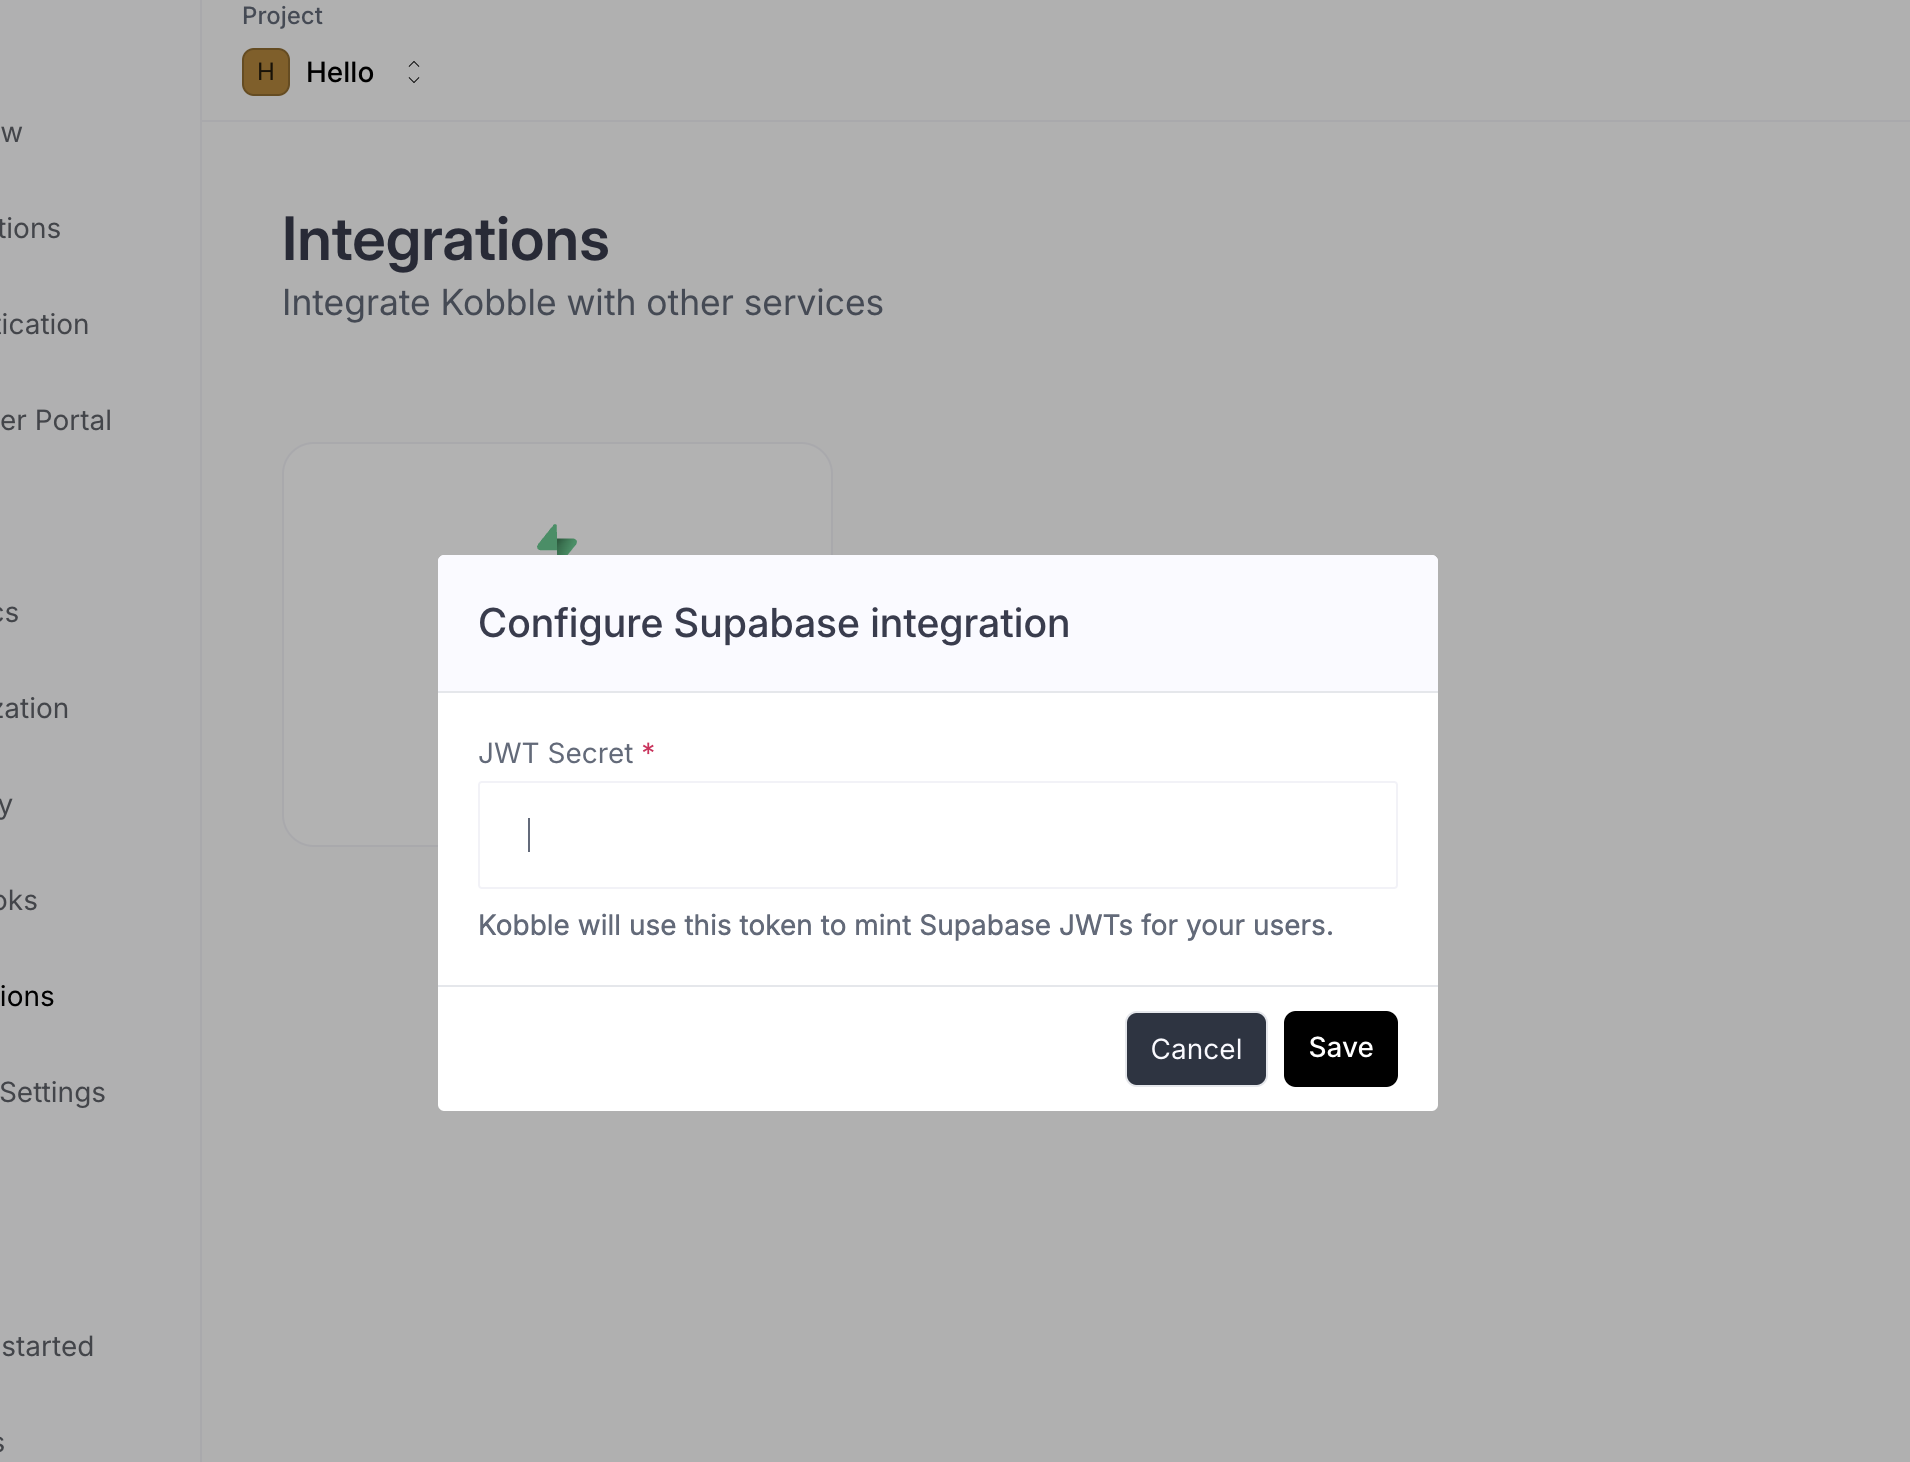
2. Paste it on Kobble
* Open your Kobble dashboard and go to [Integrations](https://app.kobble.io/p/integrations).
* Click on the **Supabase** integration.
* Paste the JWT secret key in the field provided.
 1. Install the Supabase client and kobble sdk in your project.
```bash npm theme={null}
npm i @supabase/supabase-js @kobbleio/javascript
```
```bash yarn theme={null}
yarn add @supabase/supabase-js @kobbleio/javascript
```
```bash pnpm theme={null}
pnpm add @supabase/supabase-js @kobbleio/javascript
```
Here we're using the **@kobbleio/javascript** package, which is the Kobble SDK for Single Page Applications. But you can check our [quickstart guides](/learning/quickstart/setup) for more examples.
2. Initialize your Kobble SDK (either React SDK, Vanilla SDK, or Vue SDK) with as shown in our quickstart guides.
```ts theme={null}
// src/kobble/index.ts
import { createKobbleClient } from '@kobbleio/javascript'
export const kobbleClient = createKobbleClient({
domain: import.meta.env.VITE_KOBBLE_DOMAIN,
clientId: import.meta.env.VITE_KOBBLE_CLIENT_ID,
redirectUri: import.meta.env.VITE_KOBBLE_REDIRECT_URI
})
```
3. Export a new Supabase client instance which will use the Kobble token.
```ts theme={null}
// src/supabase/index.ts
import { kobbleClient } from "../kobble";
import { createClient } from "@supabase/supabase-js";
function createKobbleSupabaseClient() {
return createClient(
import.meta.env.VITE_SUPABASE_URL!,
import.meta.env.VITE_SUPABASE_KEY!,
{
global: {
fetch: async (url, options = {}) => {
// We inject the Kobble token in the fetch headers
const token = await kobbleClient.getSupabaseToken();
const headers = new Headers(options?.headers);
headers.set("Authorization", `Bearer ${token}`);
return fetch(url, {
...options,
headers,
});
},
},
}
);
}
export const supabaseClient = createKobbleSupabaseClient();
```
Now you can use the **supabaseClient** anywhere in your app.
Here's an example function that will save a Post to your Supabase database:
```ts theme={null}
import { supabaseClient } from "../supabase";
const insertPost = async () => {
await supabaseClient.from('Posts').insert({
title: 'Hello world!',
})
}
```
Here, the supabase client will automatically send the Supabase JWT generated by Kobble to Supabase.
Supabase will accept the request due to our RLS policies that check the user ID in the request headers.
1. Install the Supabase client and kobble sdk in your project.
```bash npm theme={null}
npm i @supabase/supabase-js @kobbleio/javascript
```
```bash yarn theme={null}
yarn add @supabase/supabase-js @kobbleio/javascript
```
```bash pnpm theme={null}
pnpm add @supabase/supabase-js @kobbleio/javascript
```
Here we're using the **@kobbleio/javascript** package, which is the Kobble SDK for Single Page Applications. But you can check our [quickstart guides](/learning/quickstart/setup) for more examples.
2. Initialize your Kobble SDK (either React SDK, Vanilla SDK, or Vue SDK) with as shown in our quickstart guides.
```ts theme={null}
// src/kobble/index.ts
import { createKobbleClient } from '@kobbleio/javascript'
export const kobbleClient = createKobbleClient({
domain: import.meta.env.VITE_KOBBLE_DOMAIN,
clientId: import.meta.env.VITE_KOBBLE_CLIENT_ID,
redirectUri: import.meta.env.VITE_KOBBLE_REDIRECT_URI
})
```
3. Export a new Supabase client instance which will use the Kobble token.
```ts theme={null}
// src/supabase/index.ts
import { kobbleClient } from "../kobble";
import { createClient } from "@supabase/supabase-js";
function createKobbleSupabaseClient() {
return createClient(
import.meta.env.VITE_SUPABASE_URL!,
import.meta.env.VITE_SUPABASE_KEY!,
{
global: {
fetch: async (url, options = {}) => {
// We inject the Kobble token in the fetch headers
const token = await kobbleClient.getSupabaseToken();
const headers = new Headers(options?.headers);
headers.set("Authorization", `Bearer ${token}`);
return fetch(url, {
...options,
headers,
});
},
},
}
);
}
export const supabaseClient = createKobbleSupabaseClient();
```
Now you can use the **supabaseClient** anywhere in your app.
Here's an example function that will save a Post to your Supabase database:
```ts theme={null}
import { supabaseClient } from "../supabase";
const insertPost = async () => {
await supabaseClient.from('Posts').insert({
title: 'Hello world!',
})
}
```
Here, the supabase client will automatically send the Supabase JWT generated by Kobble to Supabase.
Supabase will accept the request due to our RLS policies that check the user ID in the request headers.
 #### 🎉 You made it!
You have successfully configured the Supabase integration! Only your imagination is the limit now\...
#### 🎉 You made it!
You have successfully configured the Supabase integration! Only your imagination is the limit now\...