> ## Documentation Index
> Fetch the complete documentation index at: https://docs.kobble.io/llms.txt
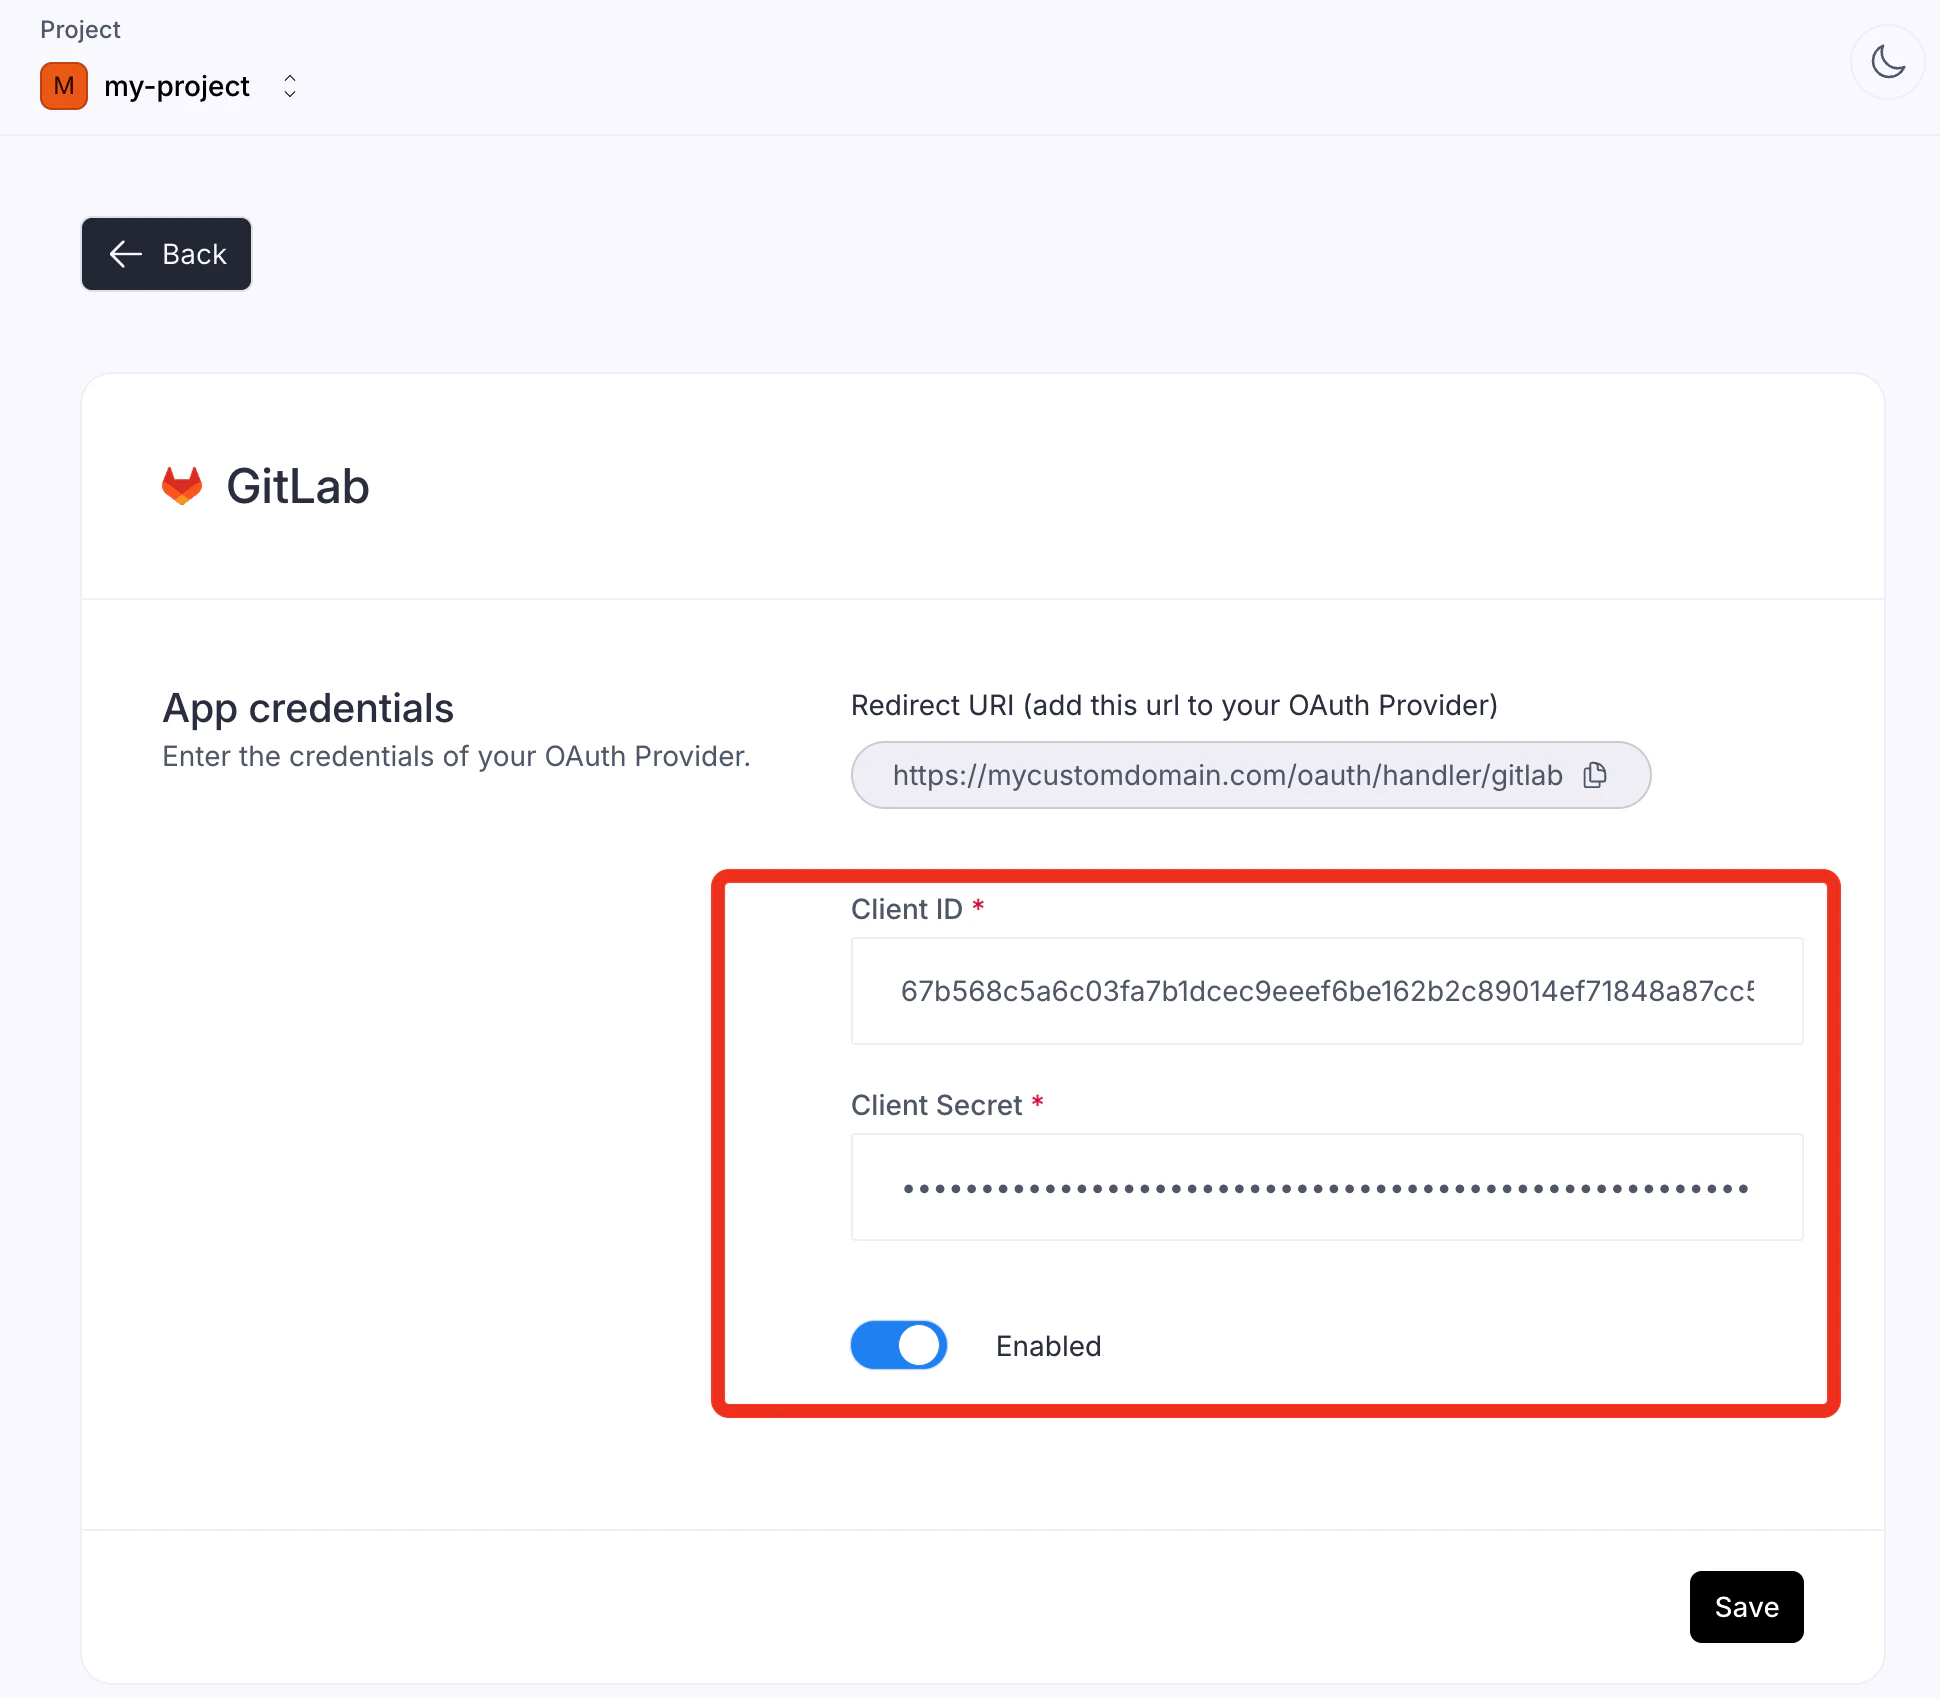
> Use this file to discover all available pages before exploring further.
# GitLab
> Configure GitLab OAuth for your Customer Portal.
## Overview
Offering a sign in with GitLab in your Customer Portal can be great if you target a developer audience. It allows your users to sign in with their GitLab account and provides you with their GitLab profile.
To support Sign in with GitLab you need to configure the GitLab provider in the Kobble dashboard for your project.
Once configured, the GitLab sign-in button will automatically be added on your Kobble Customer Portal.
## Configuration
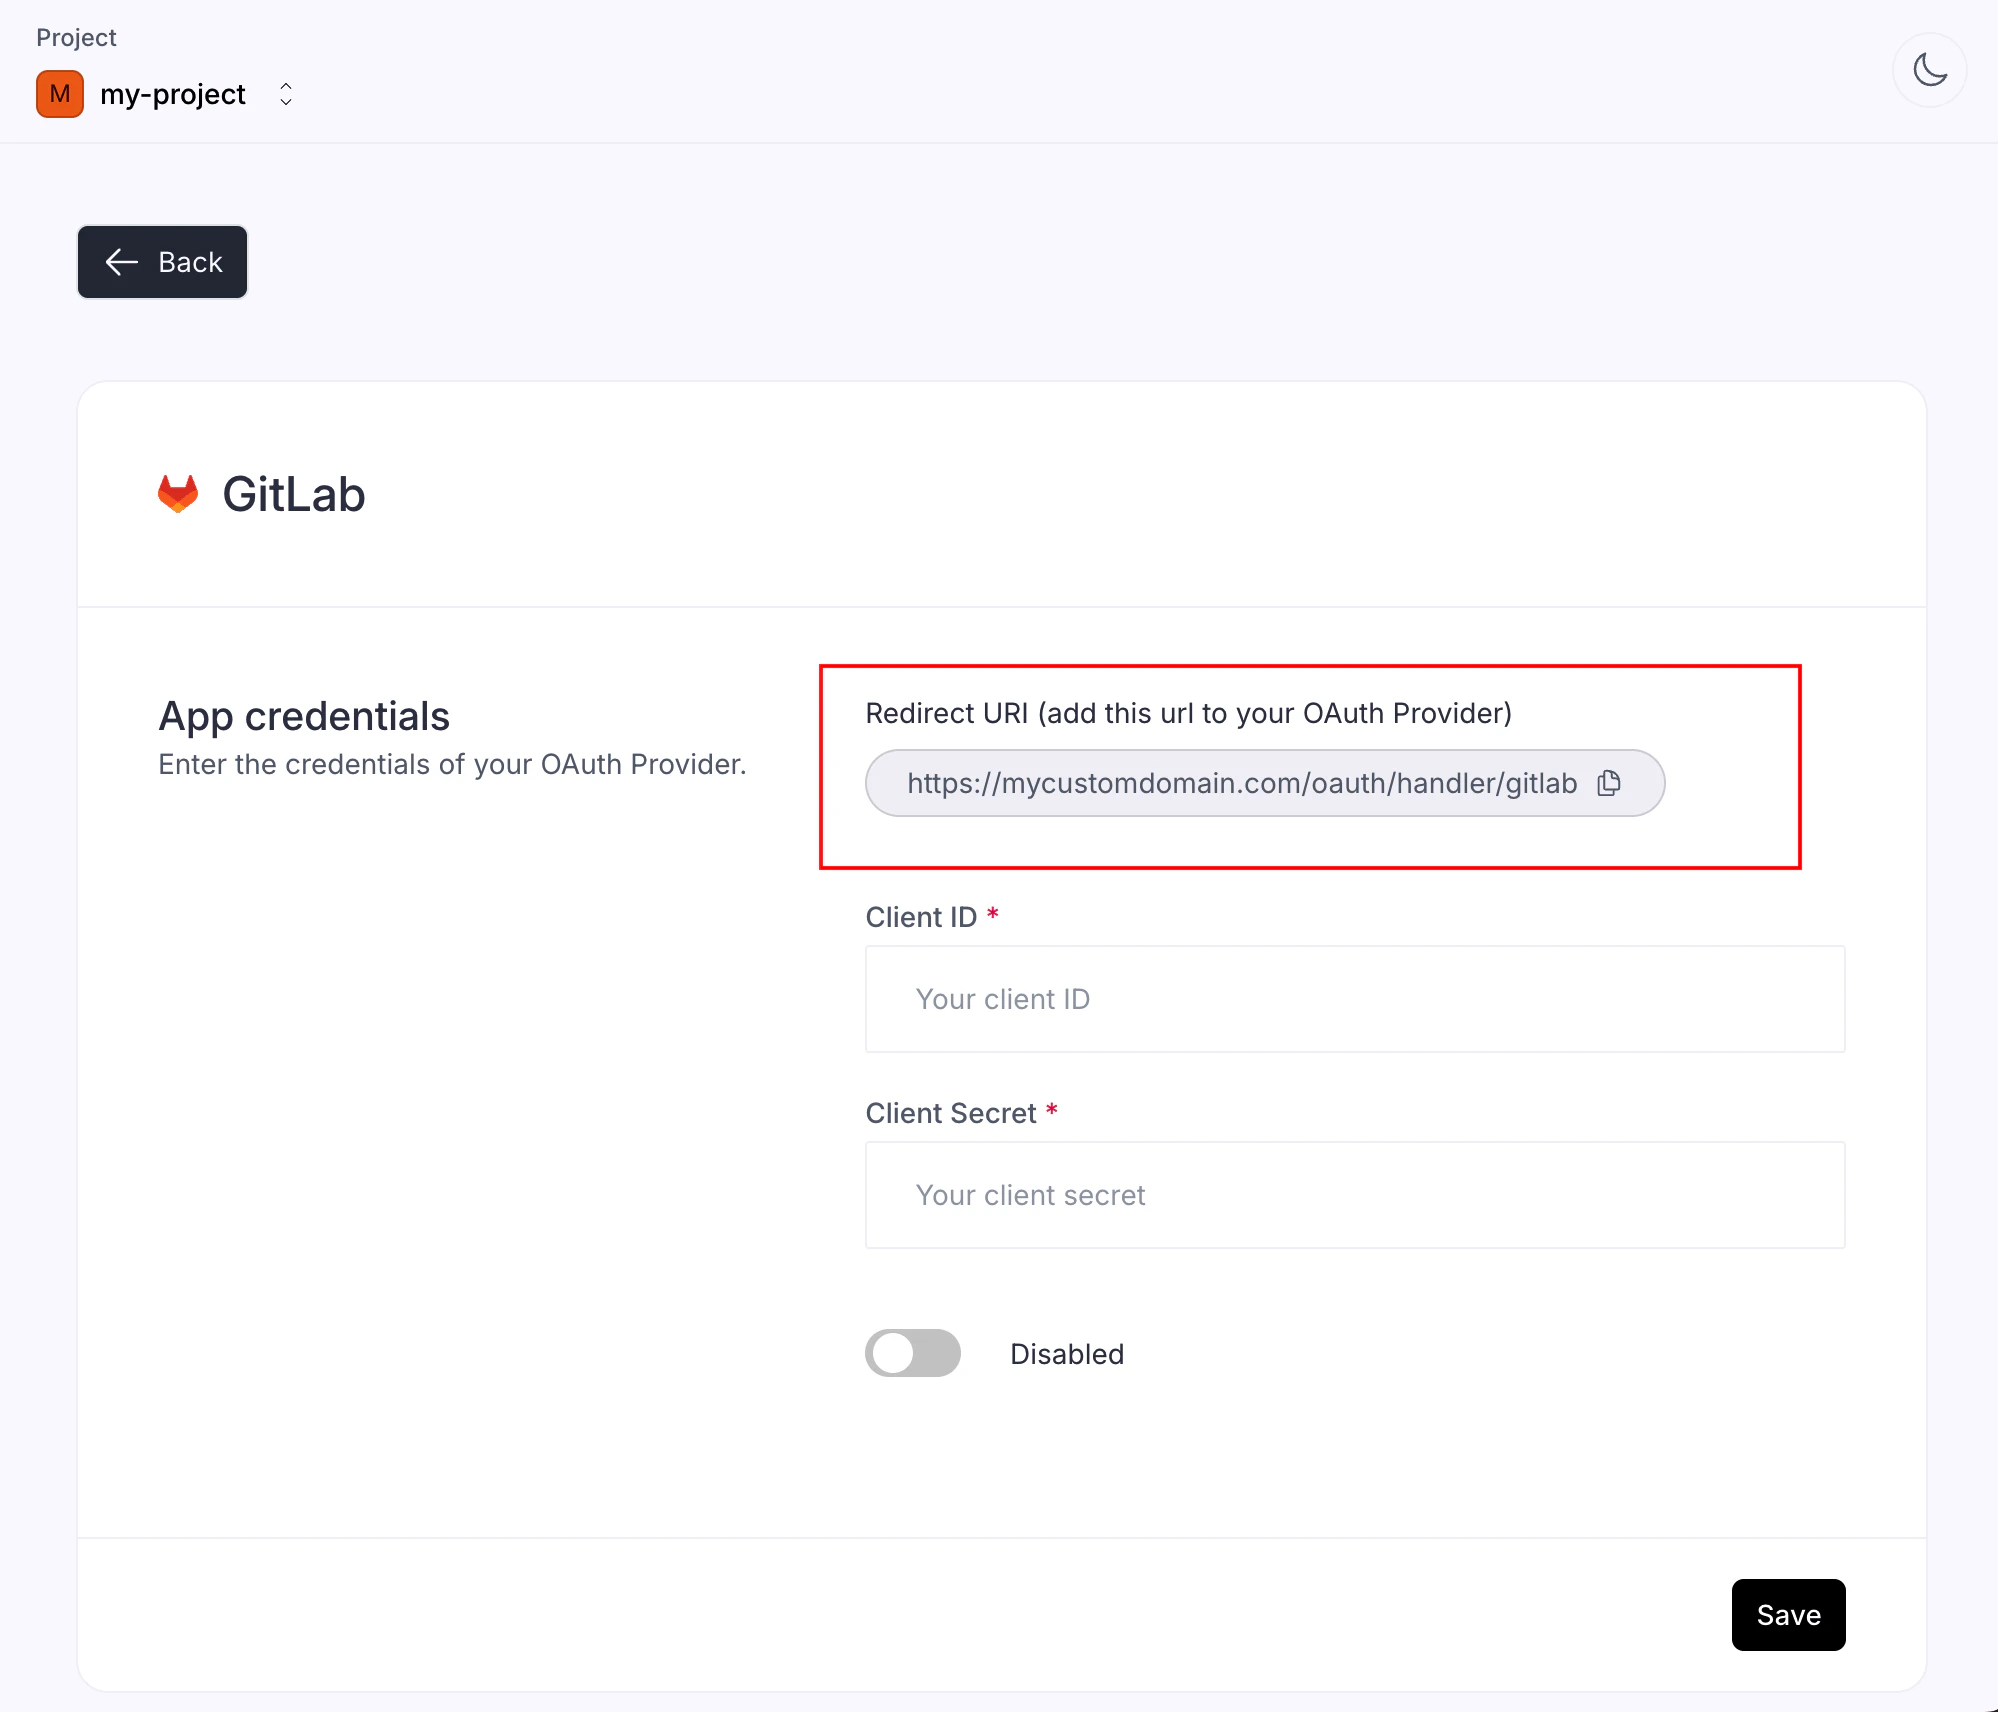
1. Navigate to the [Authentication](https://app.kobble.io/p/authentication) section and choose the GitLab provider.
2. Copy the provided Redirect URI. Note this URI will change if you configure a custom domain later.
 3. Open [your GitLab account](https://gitlab.com).
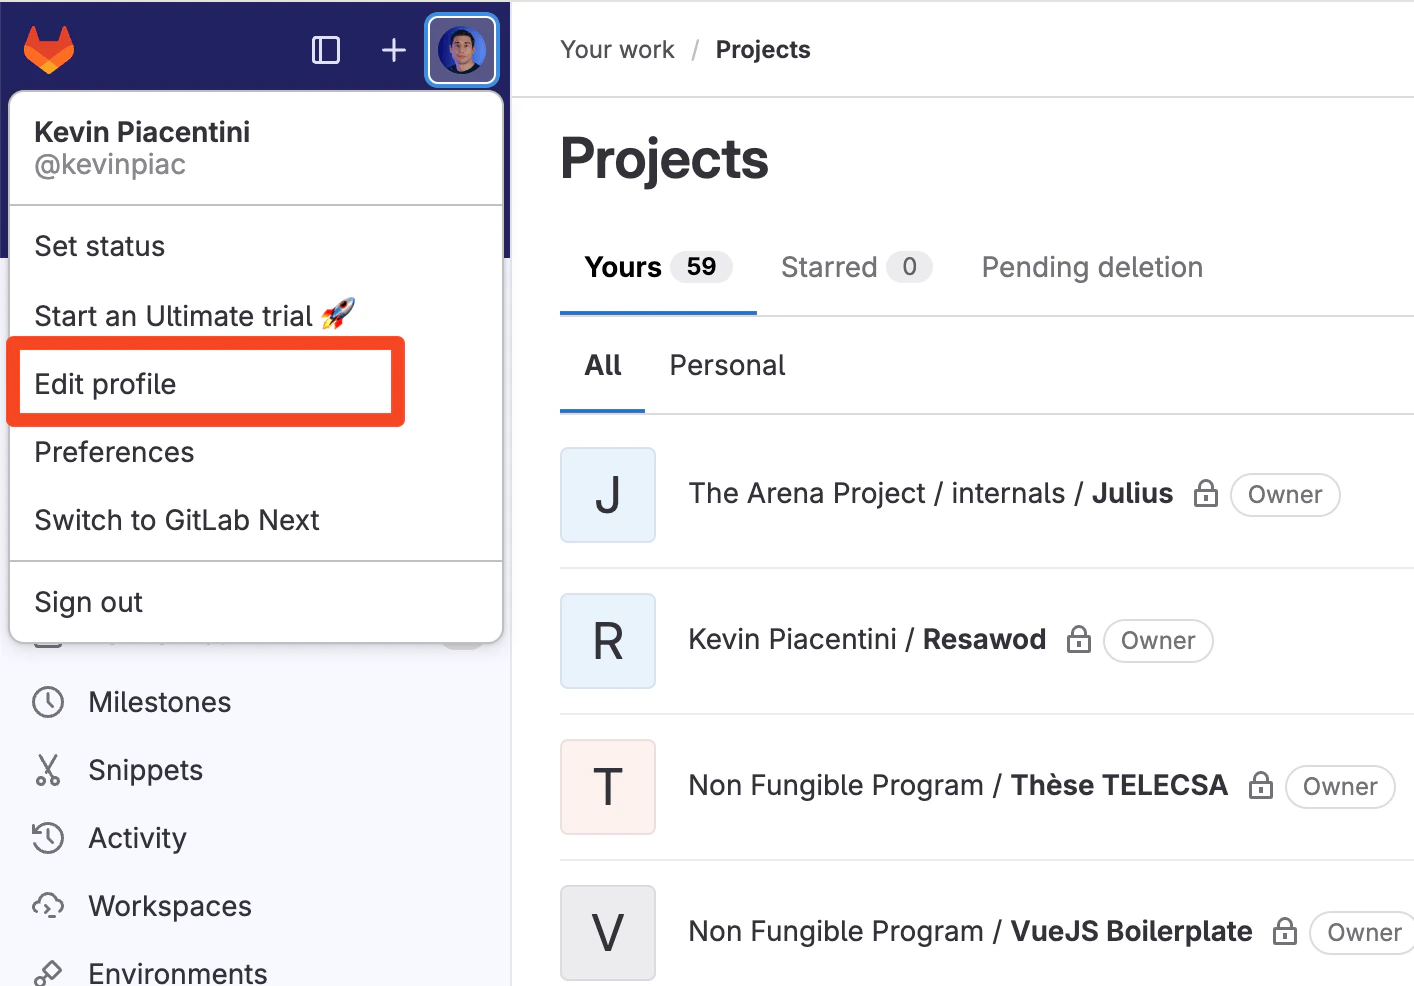
4. Click on your profile picture and select Edit Profile.
3. Open [your GitLab account](https://gitlab.com).
4. Click on your profile picture and select Edit Profile.
 5. Then, on the left menu, choose Applications and click on Add new application.
6. Fill in the form with the information of your application and the Redirect URI provided by Kobble and select the scopes **read\_user**, **openid**, **profile**, **email**.
5. Then, on the left menu, choose Applications and click on Add new application.
6. Fill in the form with the information of your application and the Redirect URI provided by Kobble and select the scopes **read\_user**, **openid**, **profile**, **email**.
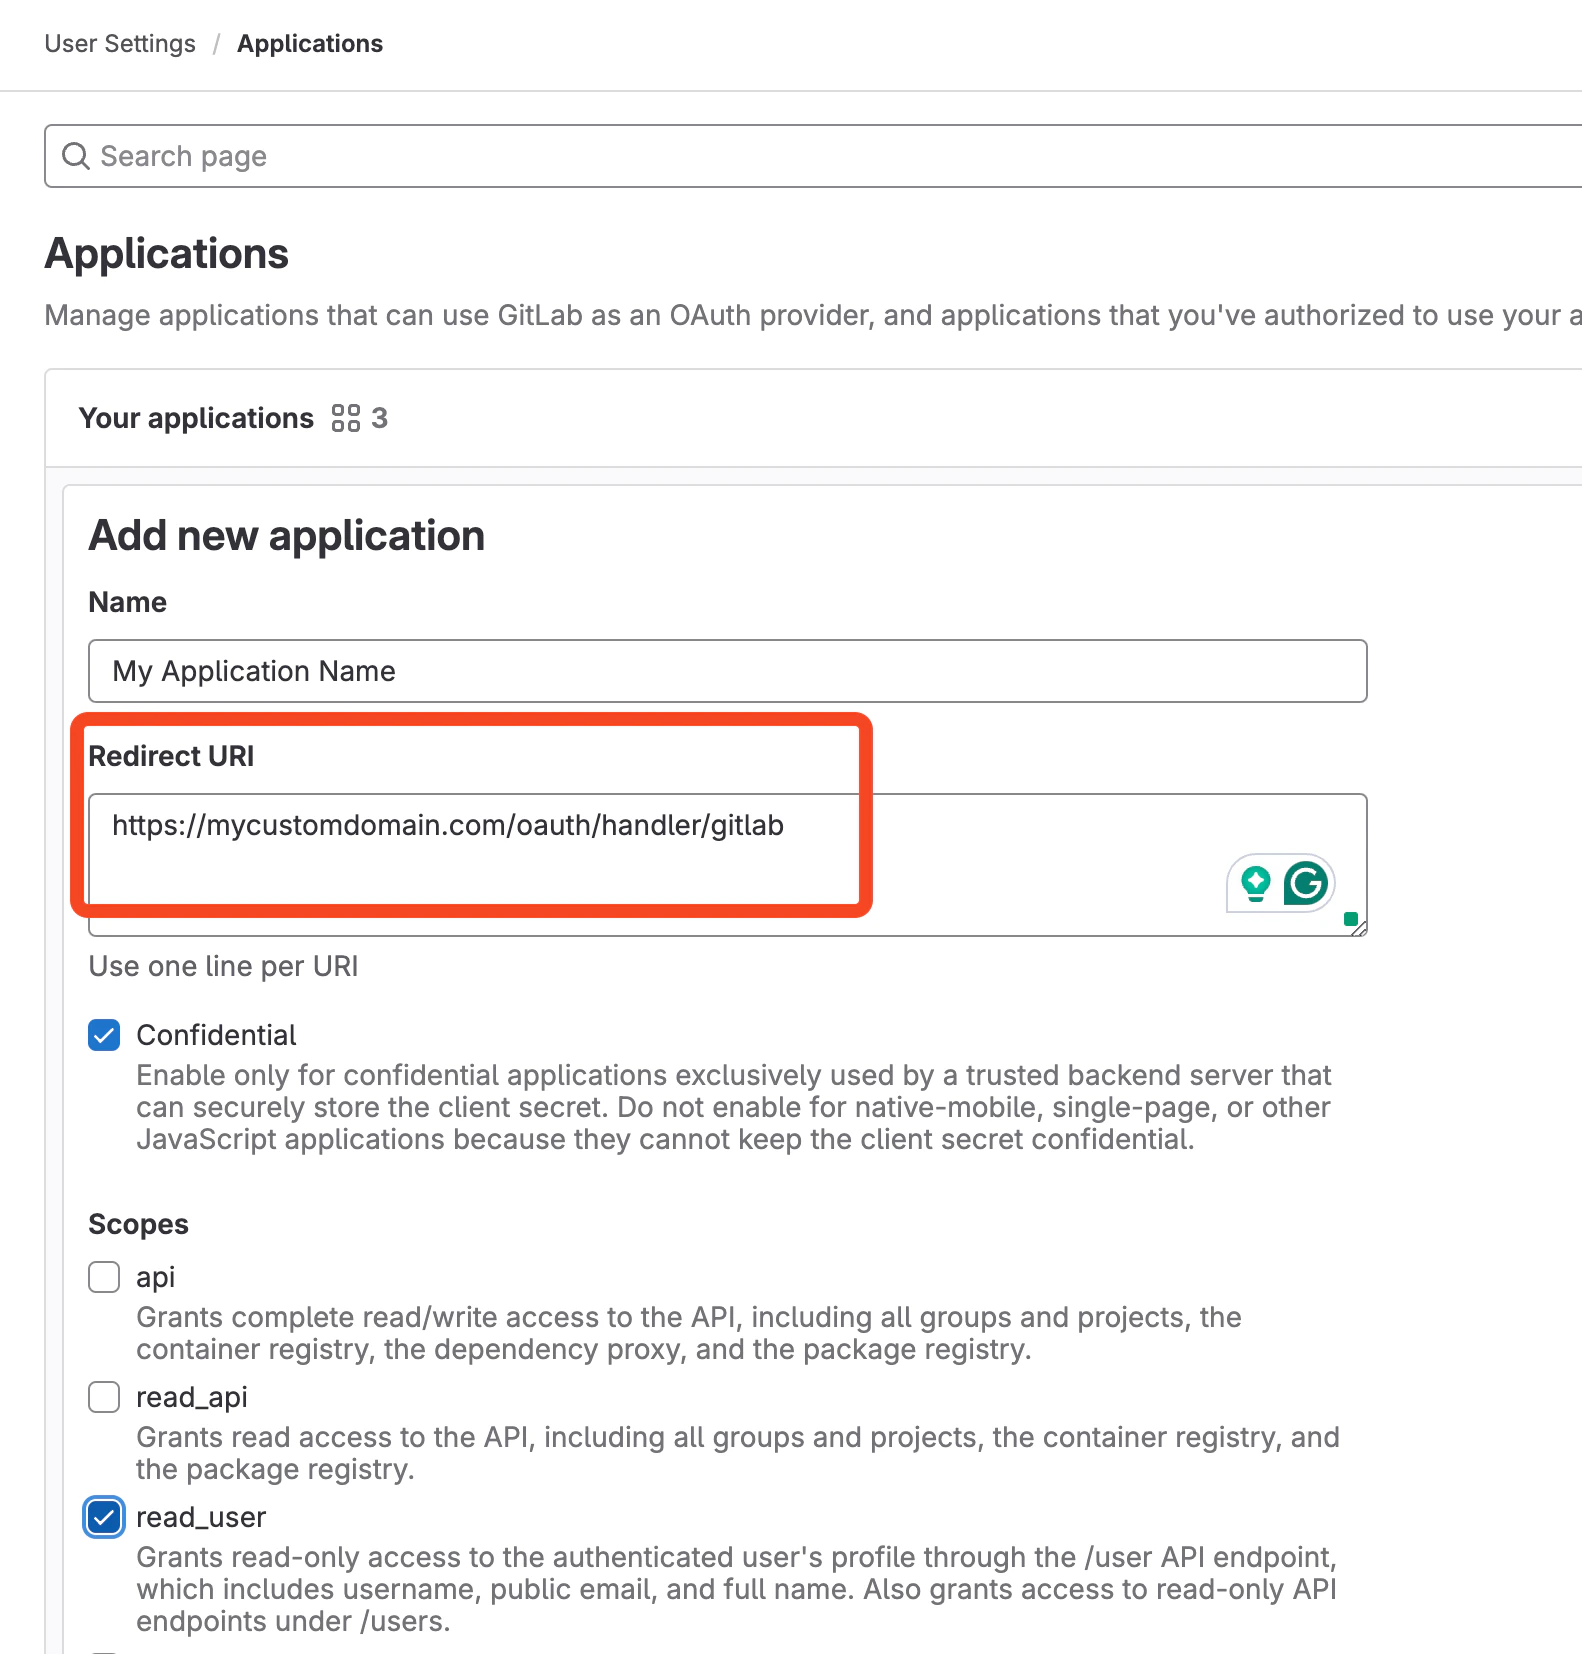 Before saving, make sure you have checked the following scopes: **read\_user**, **openid**, **profile**, **email**.
8. Once created, copy the given Application ID and Secret.
Before saving, make sure you have checked the following scopes: **read\_user**, **openid**, **profile**, **email**.
8. Once created, copy the given Application ID and Secret.
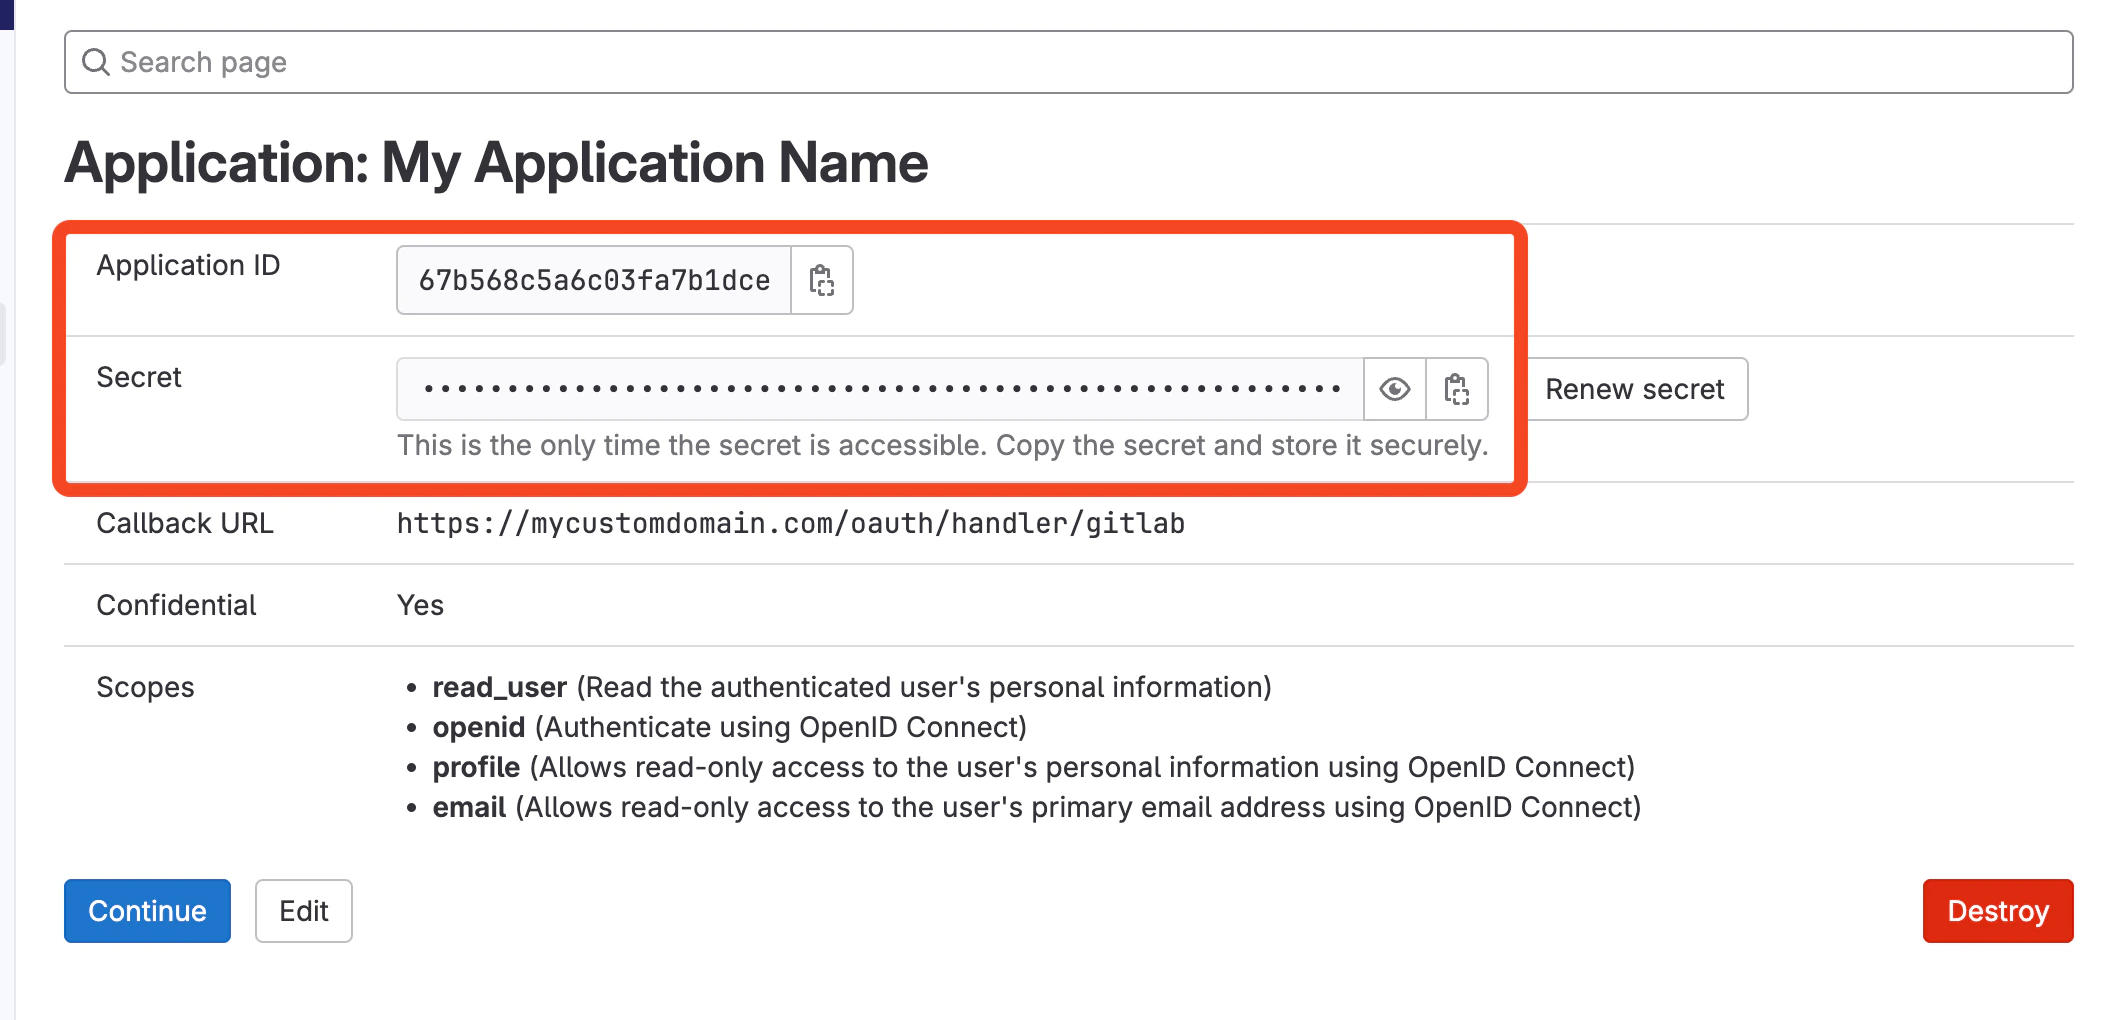 9. Paste them into your Kobble settings, turn on the Enabled switch and save.
 🎉 Et voilà! Your customer can now use GitLab to sign-in in your authentication portal. No further action is required on your end.
In case you change your Customer Portal domain later, you will have to go through this process again and update your Authorized Redirect URI in your GitLab configuration.
🎉 Et voilà! Your customer can now use GitLab to sign-in in your authentication portal. No further action is required on your end.
In case you change your Customer Portal domain later, you will have to go through this process again and update your Authorized Redirect URI in your GitLab configuration.