Overview
Offering a sign in with Azure AD in your Customer Portal may be a good idea for businesses that already use Microsoft services. It allows your users to sign in with their Microsoft account, which is convenient and secure.
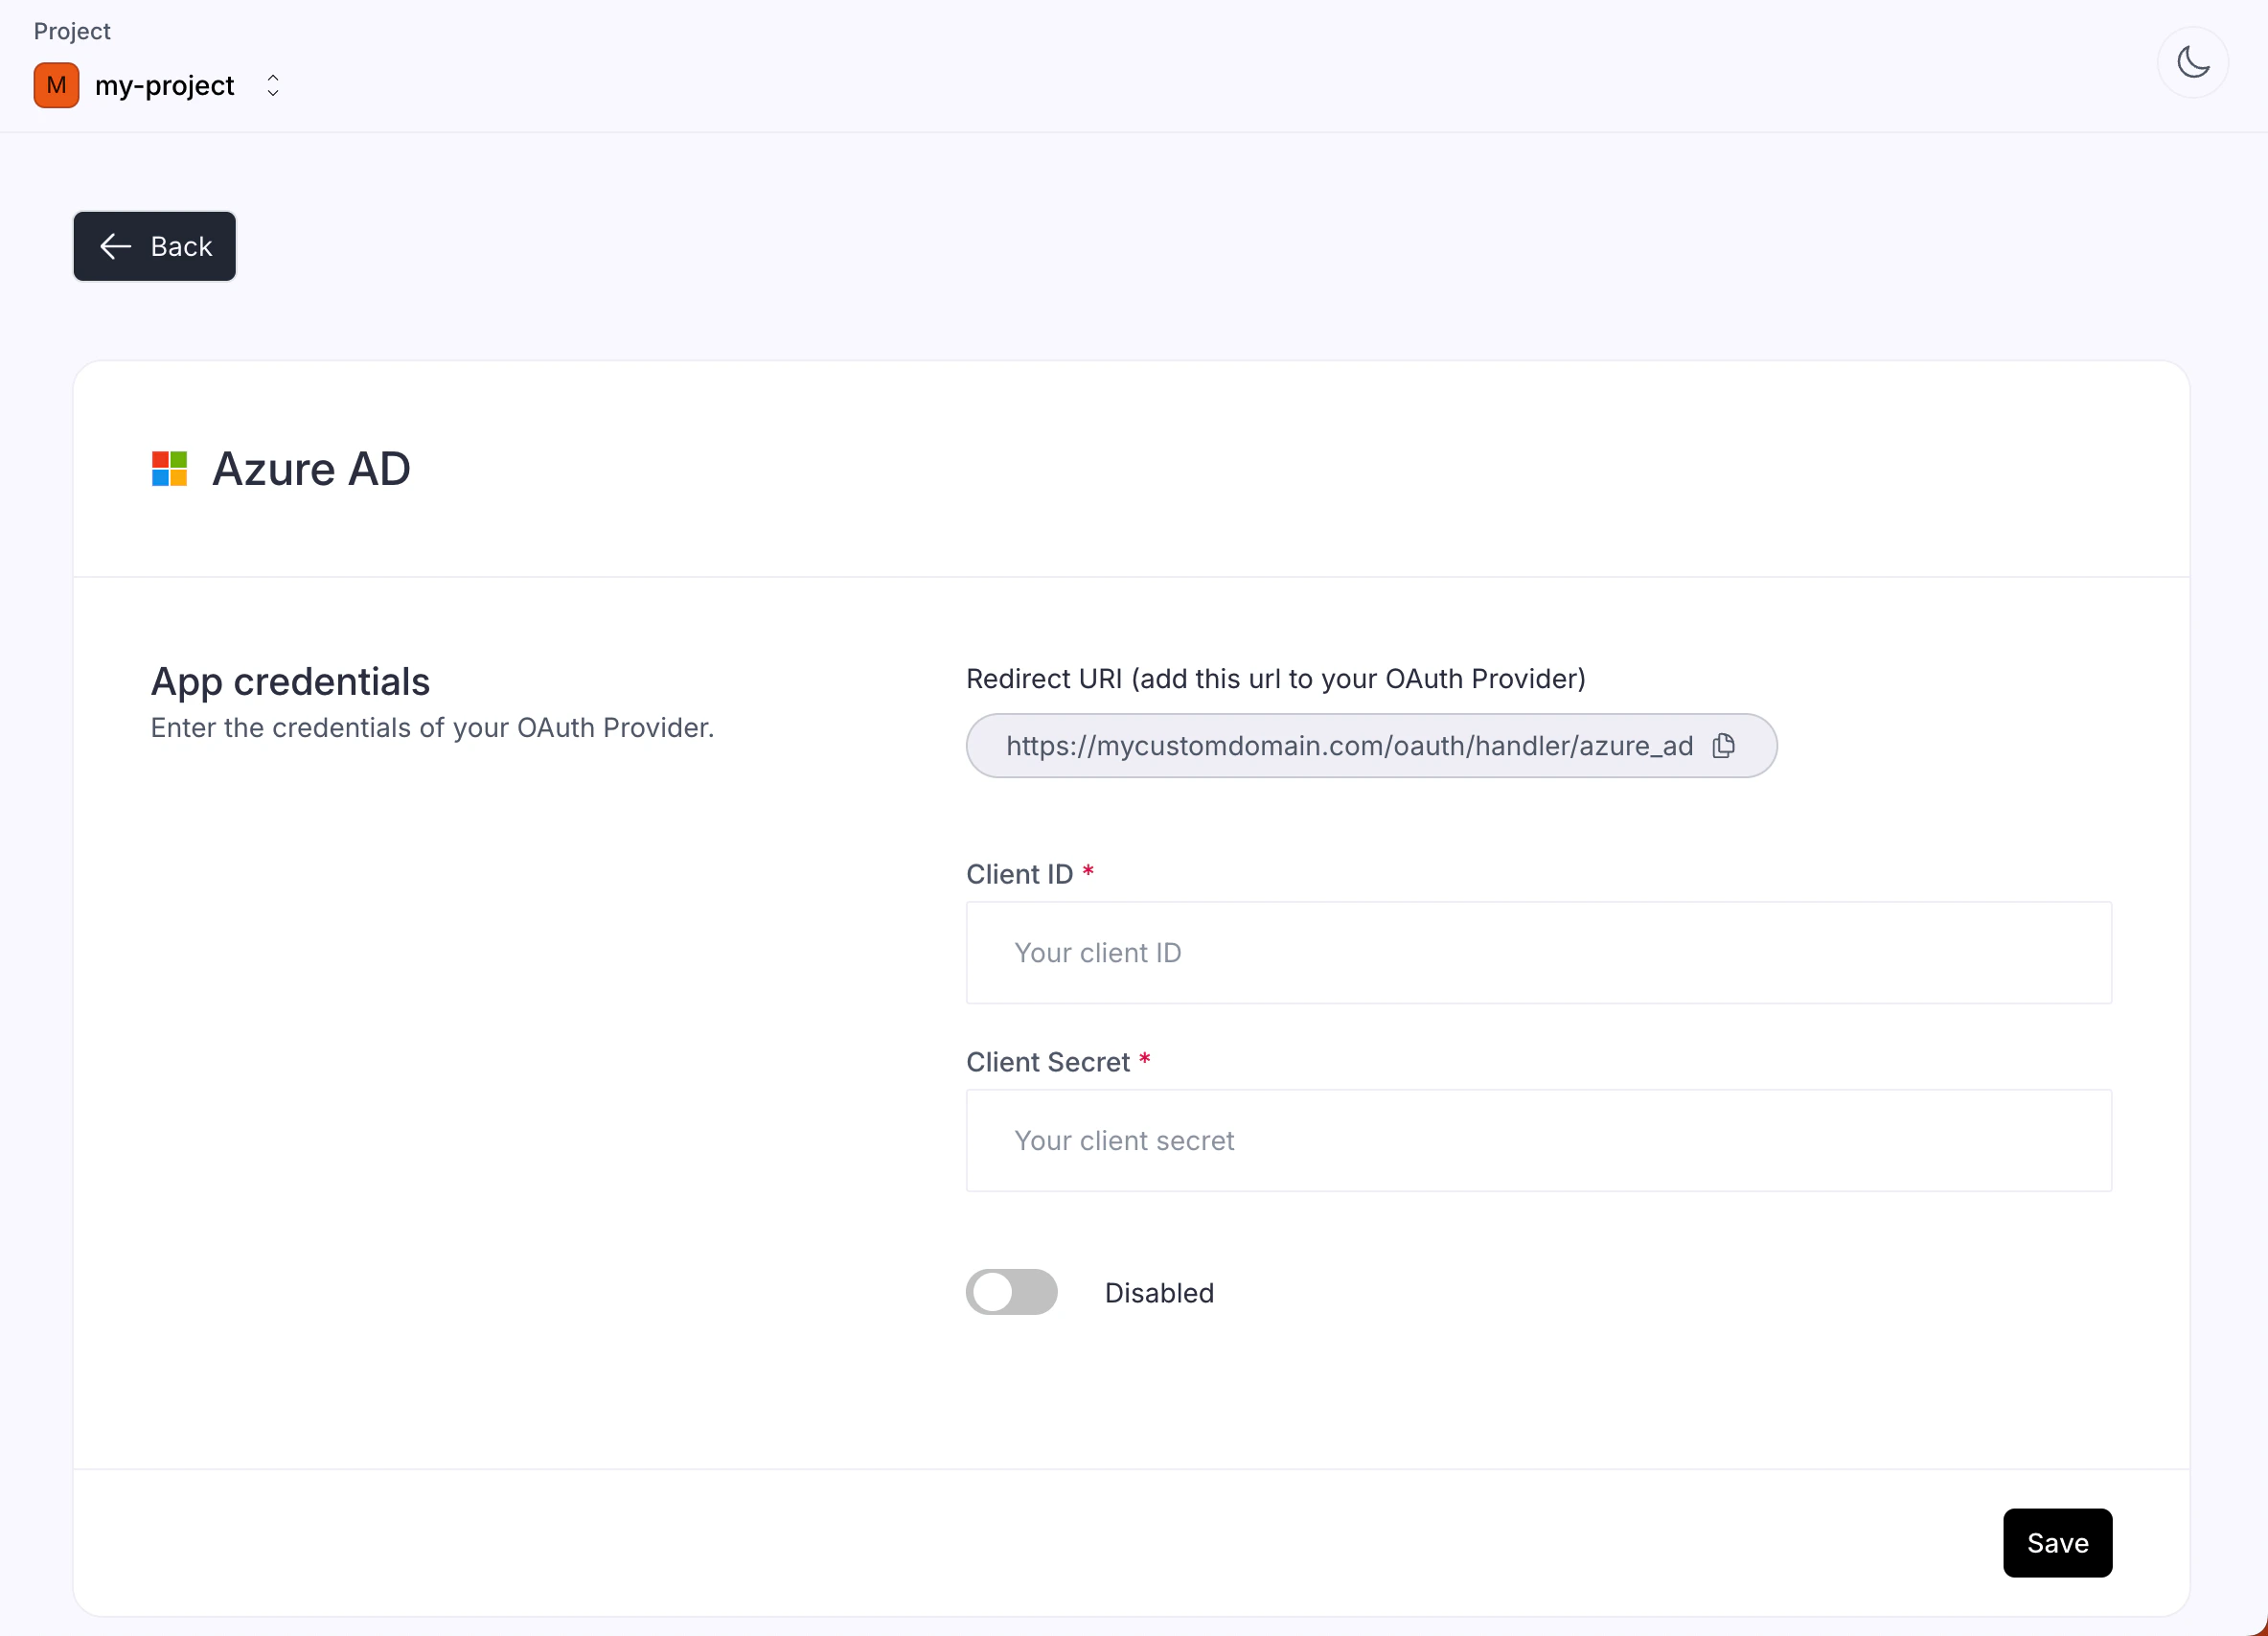
To support Sign in with Azure AD you need to configure the Azure AD provider in the Kobble dashboard for your project.
Once configured, the Azure AD sign-in button will automatically be added on your Kobble Customer Portal.
Configuration
- Navigate to the Authentication section and choose the Azure AD provider.
- Copy the provided Redirect URI. Note this URI will change if you configure a custom domain later.
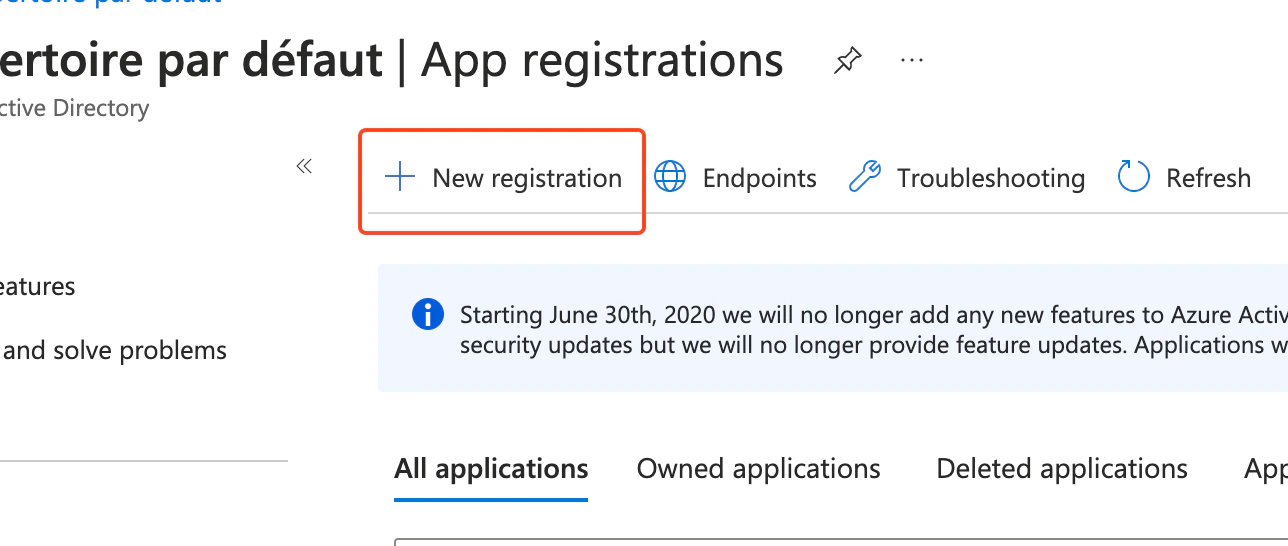
- Open your Azure Portal and navigate to the Azure Active Directory section.
- Click on App registrations and then New registration.
- Fill the OAuth form on your Azure Portal. Choose a Web platform and paste the Redirect URI provided by Kobble.

- Save your app.
- On the app page, create a new Client Secret by clicking on Add a certificate or secret
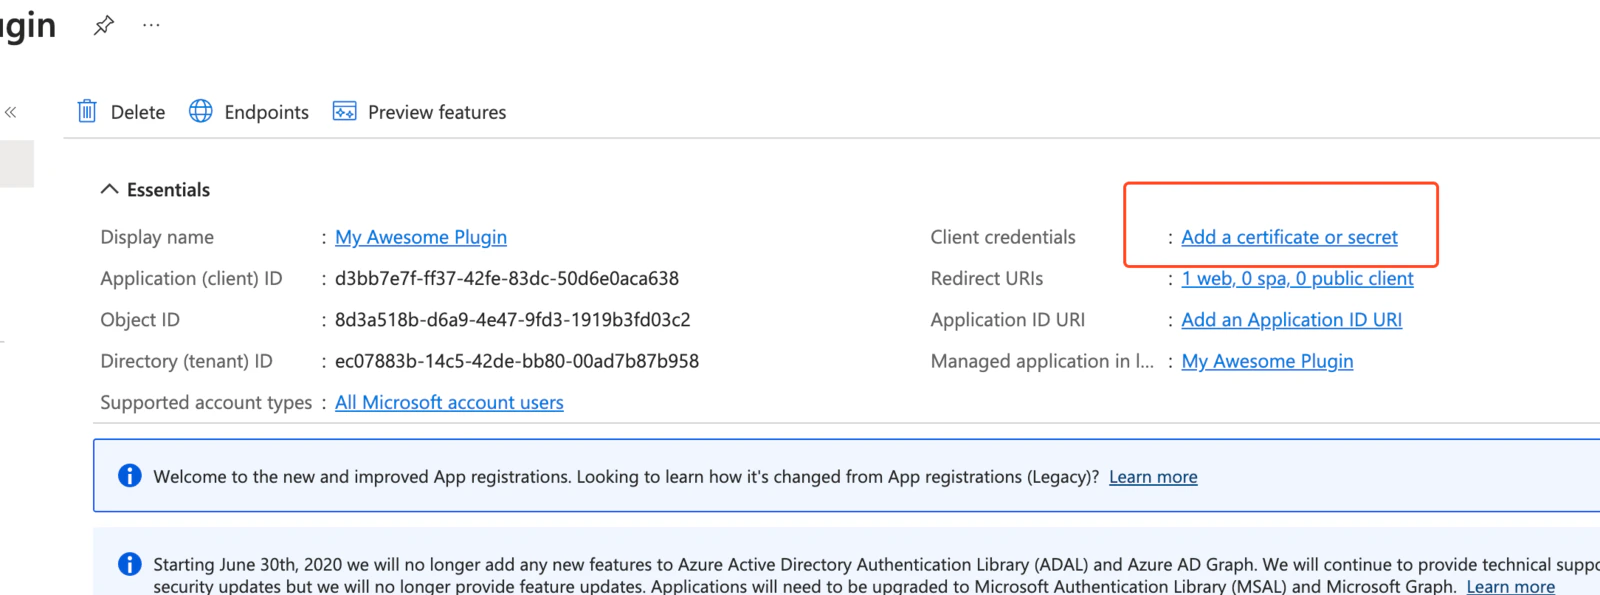
- Select an expiration date that fits your needs and save the secret.
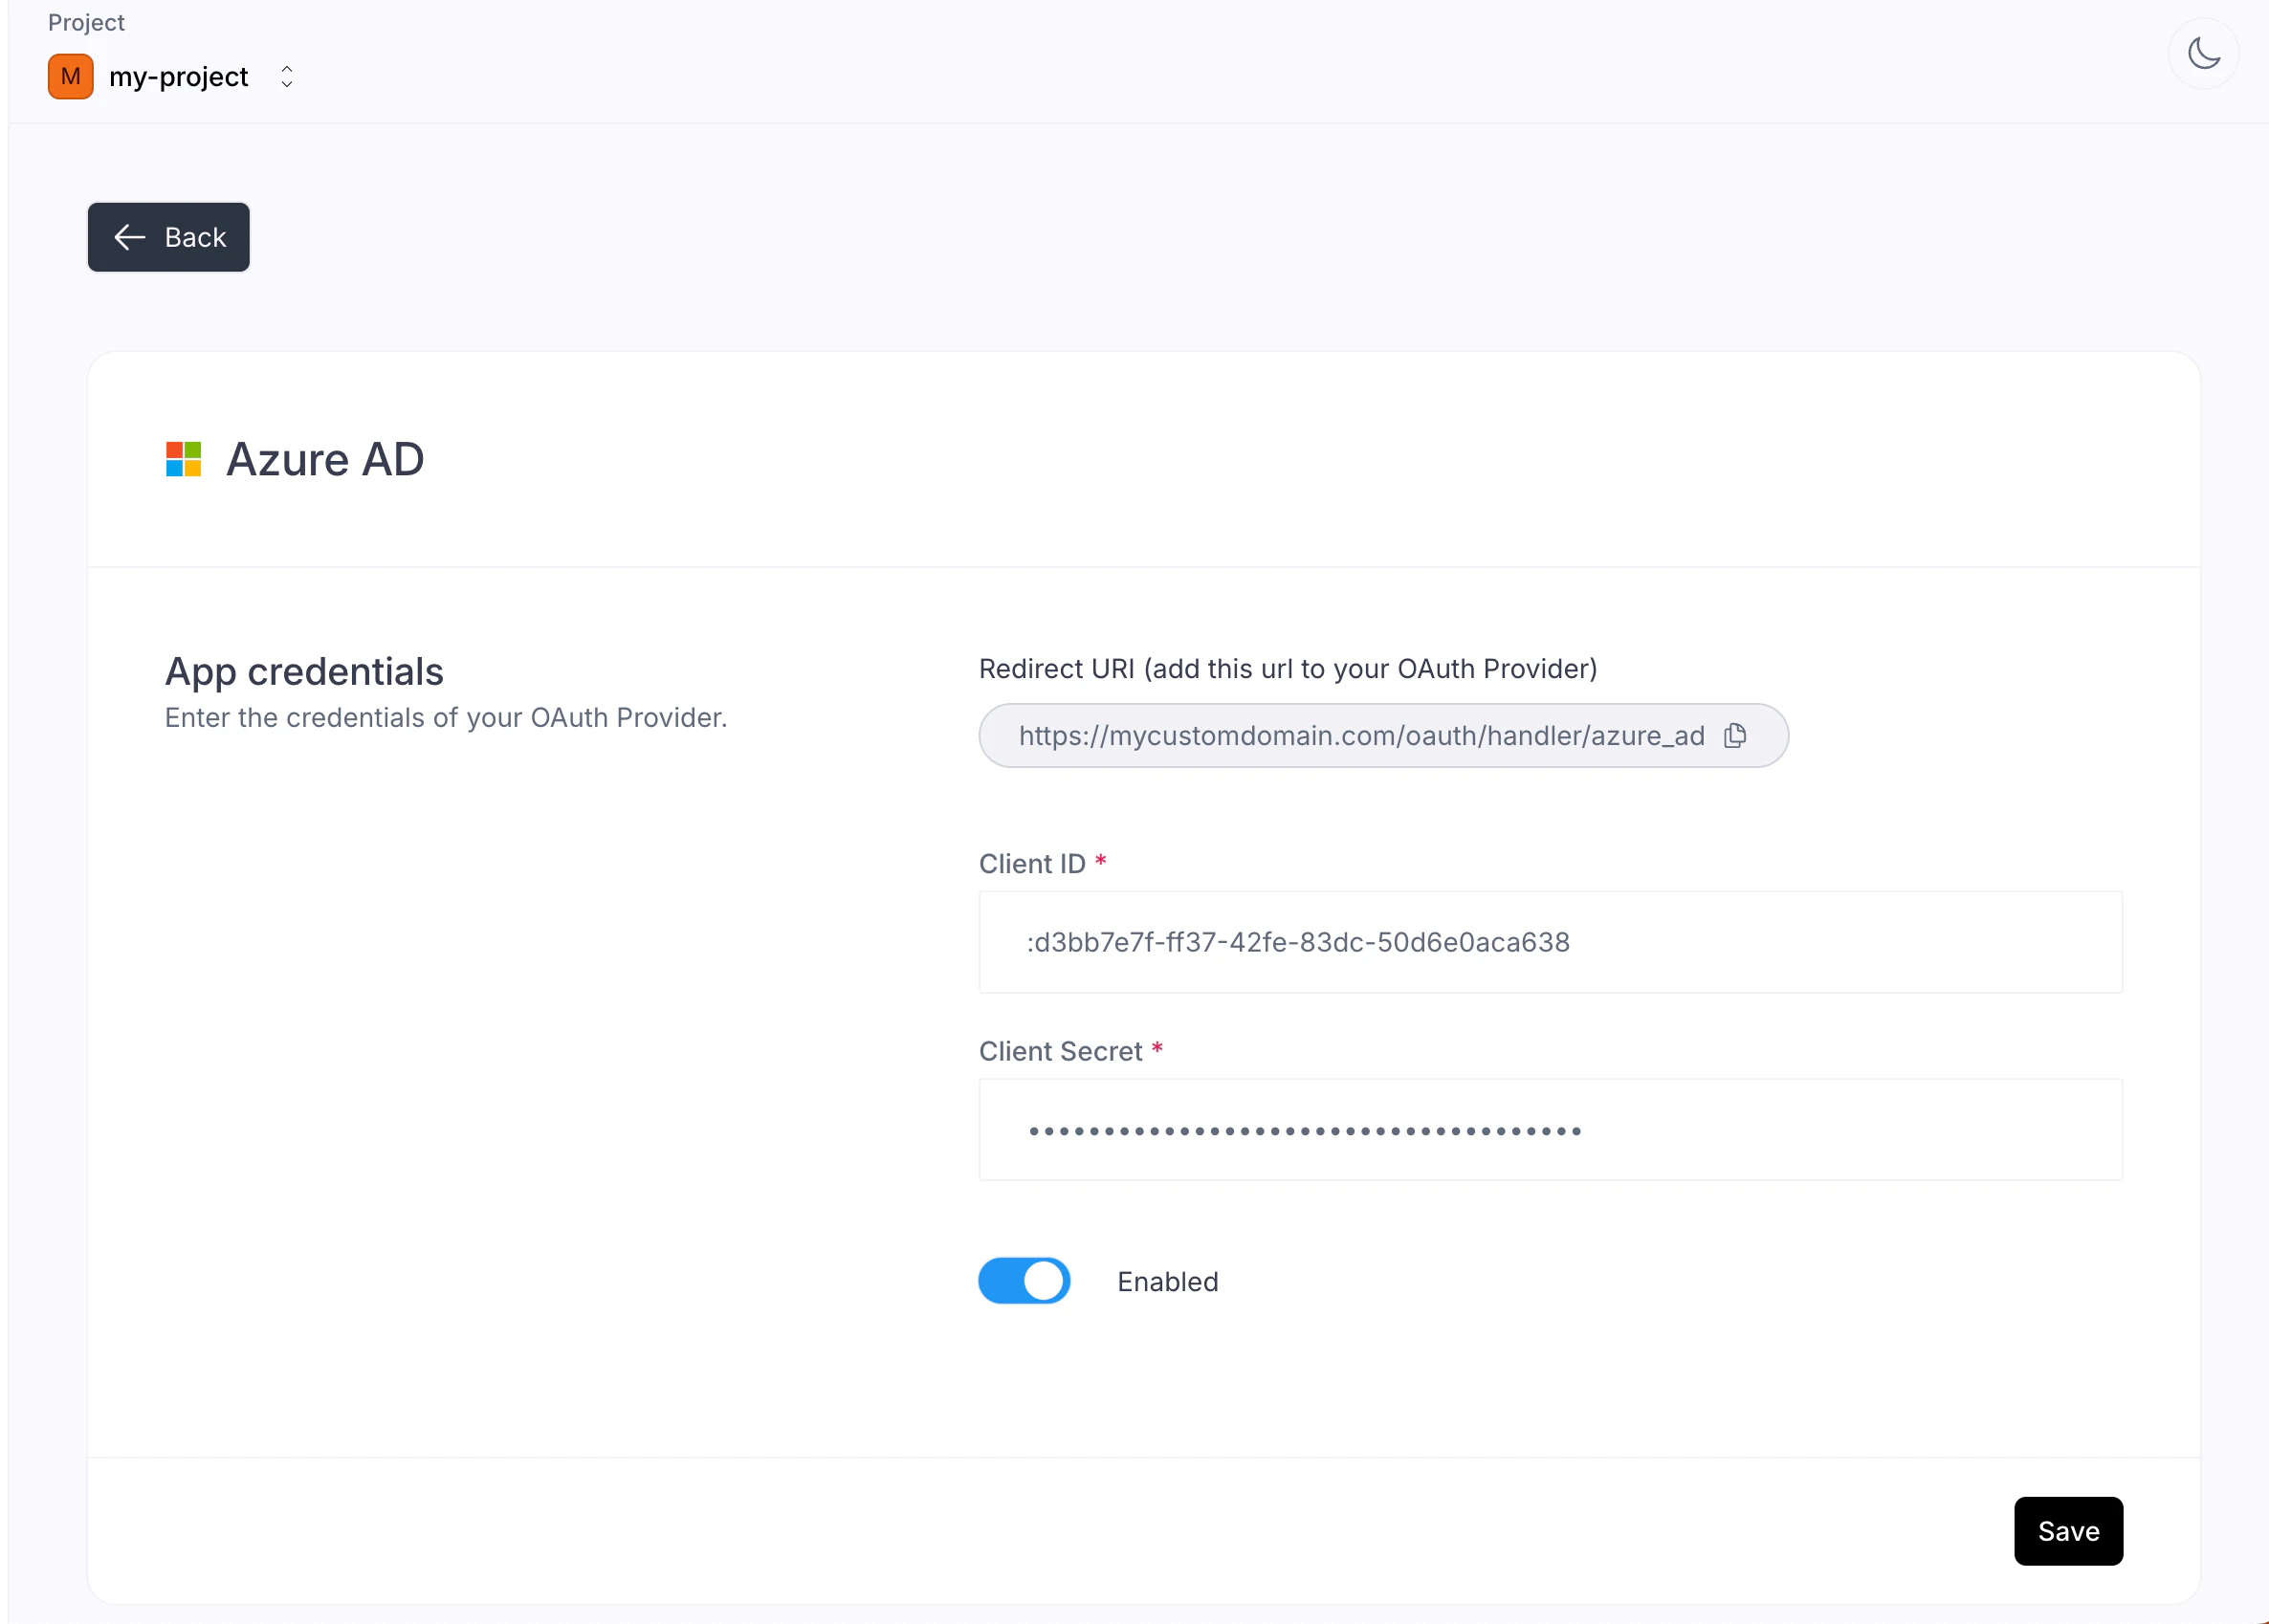
- Copy/paste the Client Id and Client Secret into your Kobble settings, turn on the Enabled switch and save.
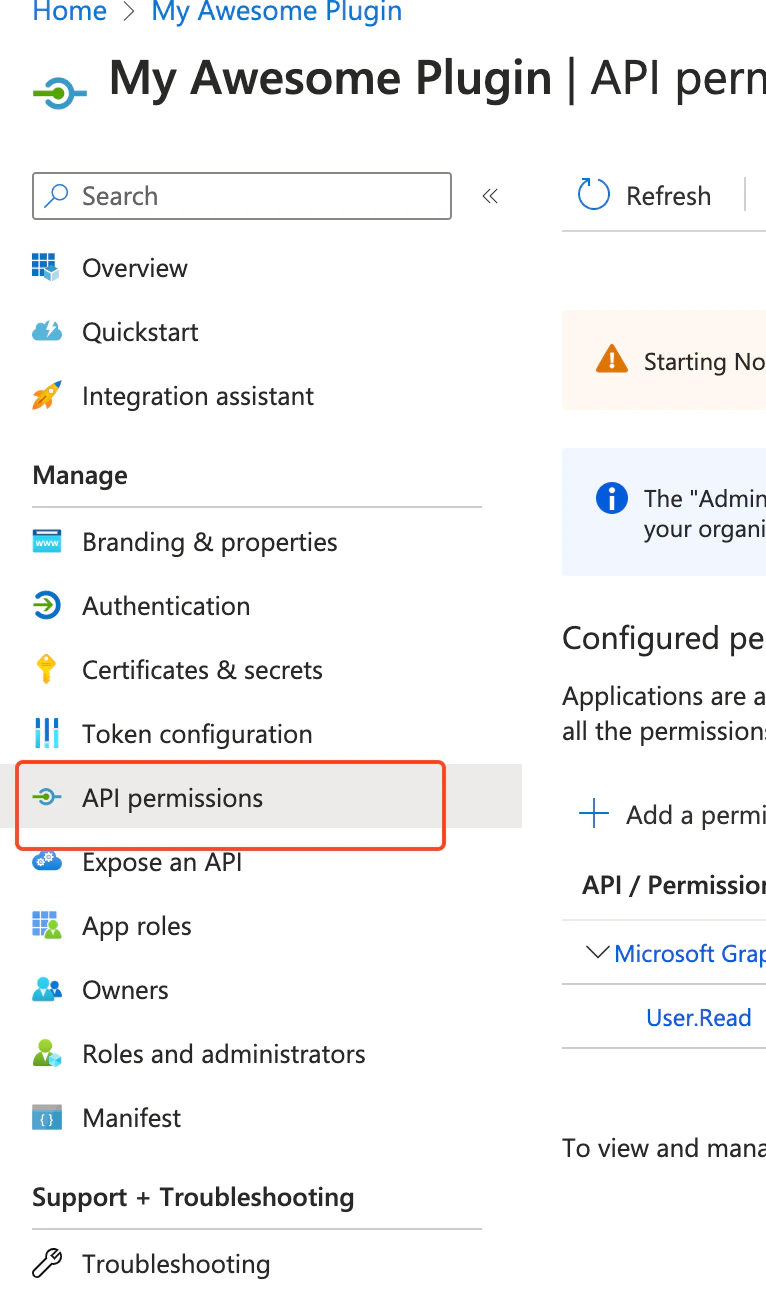
- Go to API Permissions in the left menu of your Azure Portal.
- Click on Add a permission
- In the slider, click on Microsoft Graph and choose Delegated permissions
- Select the following permissions: email, openid, profile and save.
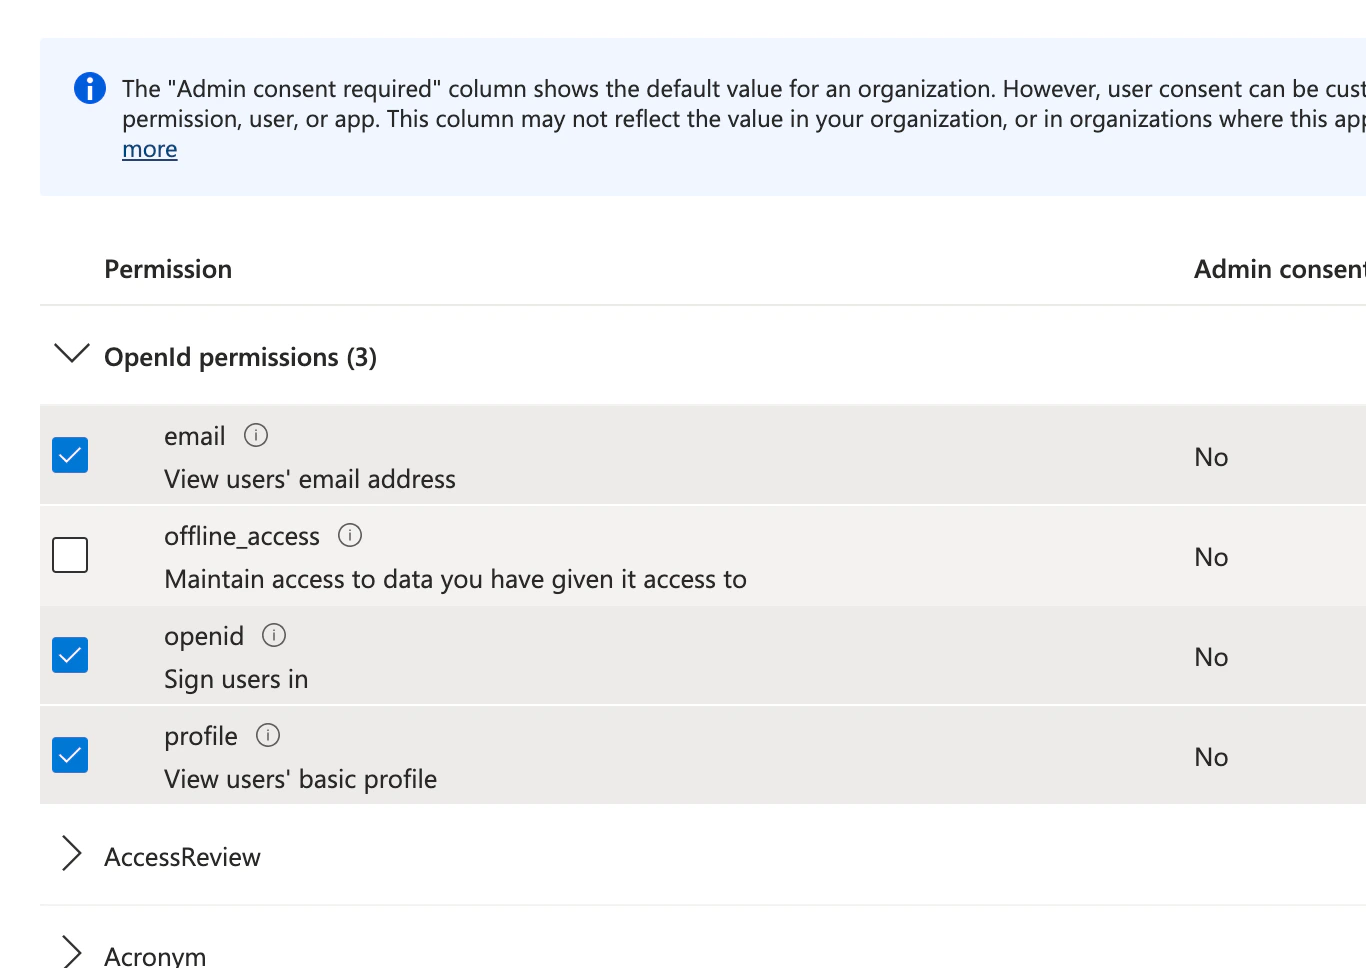
Don’t forget to add the following permissions to your Azure configuration: email, openid, profile.
In case you change your Customer Portal domain later, you will have to go through this process again and update your Authorized Redirect URI in your Azure Client ID.