Overview
Offering a sign in with Google in your Customer Portal often result in a better user experience and increase the conversion of your funnel. Moreover, Google accounts provide more information about your users such as the name and profile picture. To support Sign in with Google you need to configure the Google provider in the Kobble dashboard for your project. Once configured, the Google sign-in button will automatically be added on your Kobble Customer Portal. Before you can use Sign in with Google, you need to obtain a Google Cloud Platform account and have a project ready or create a new one.Configuration
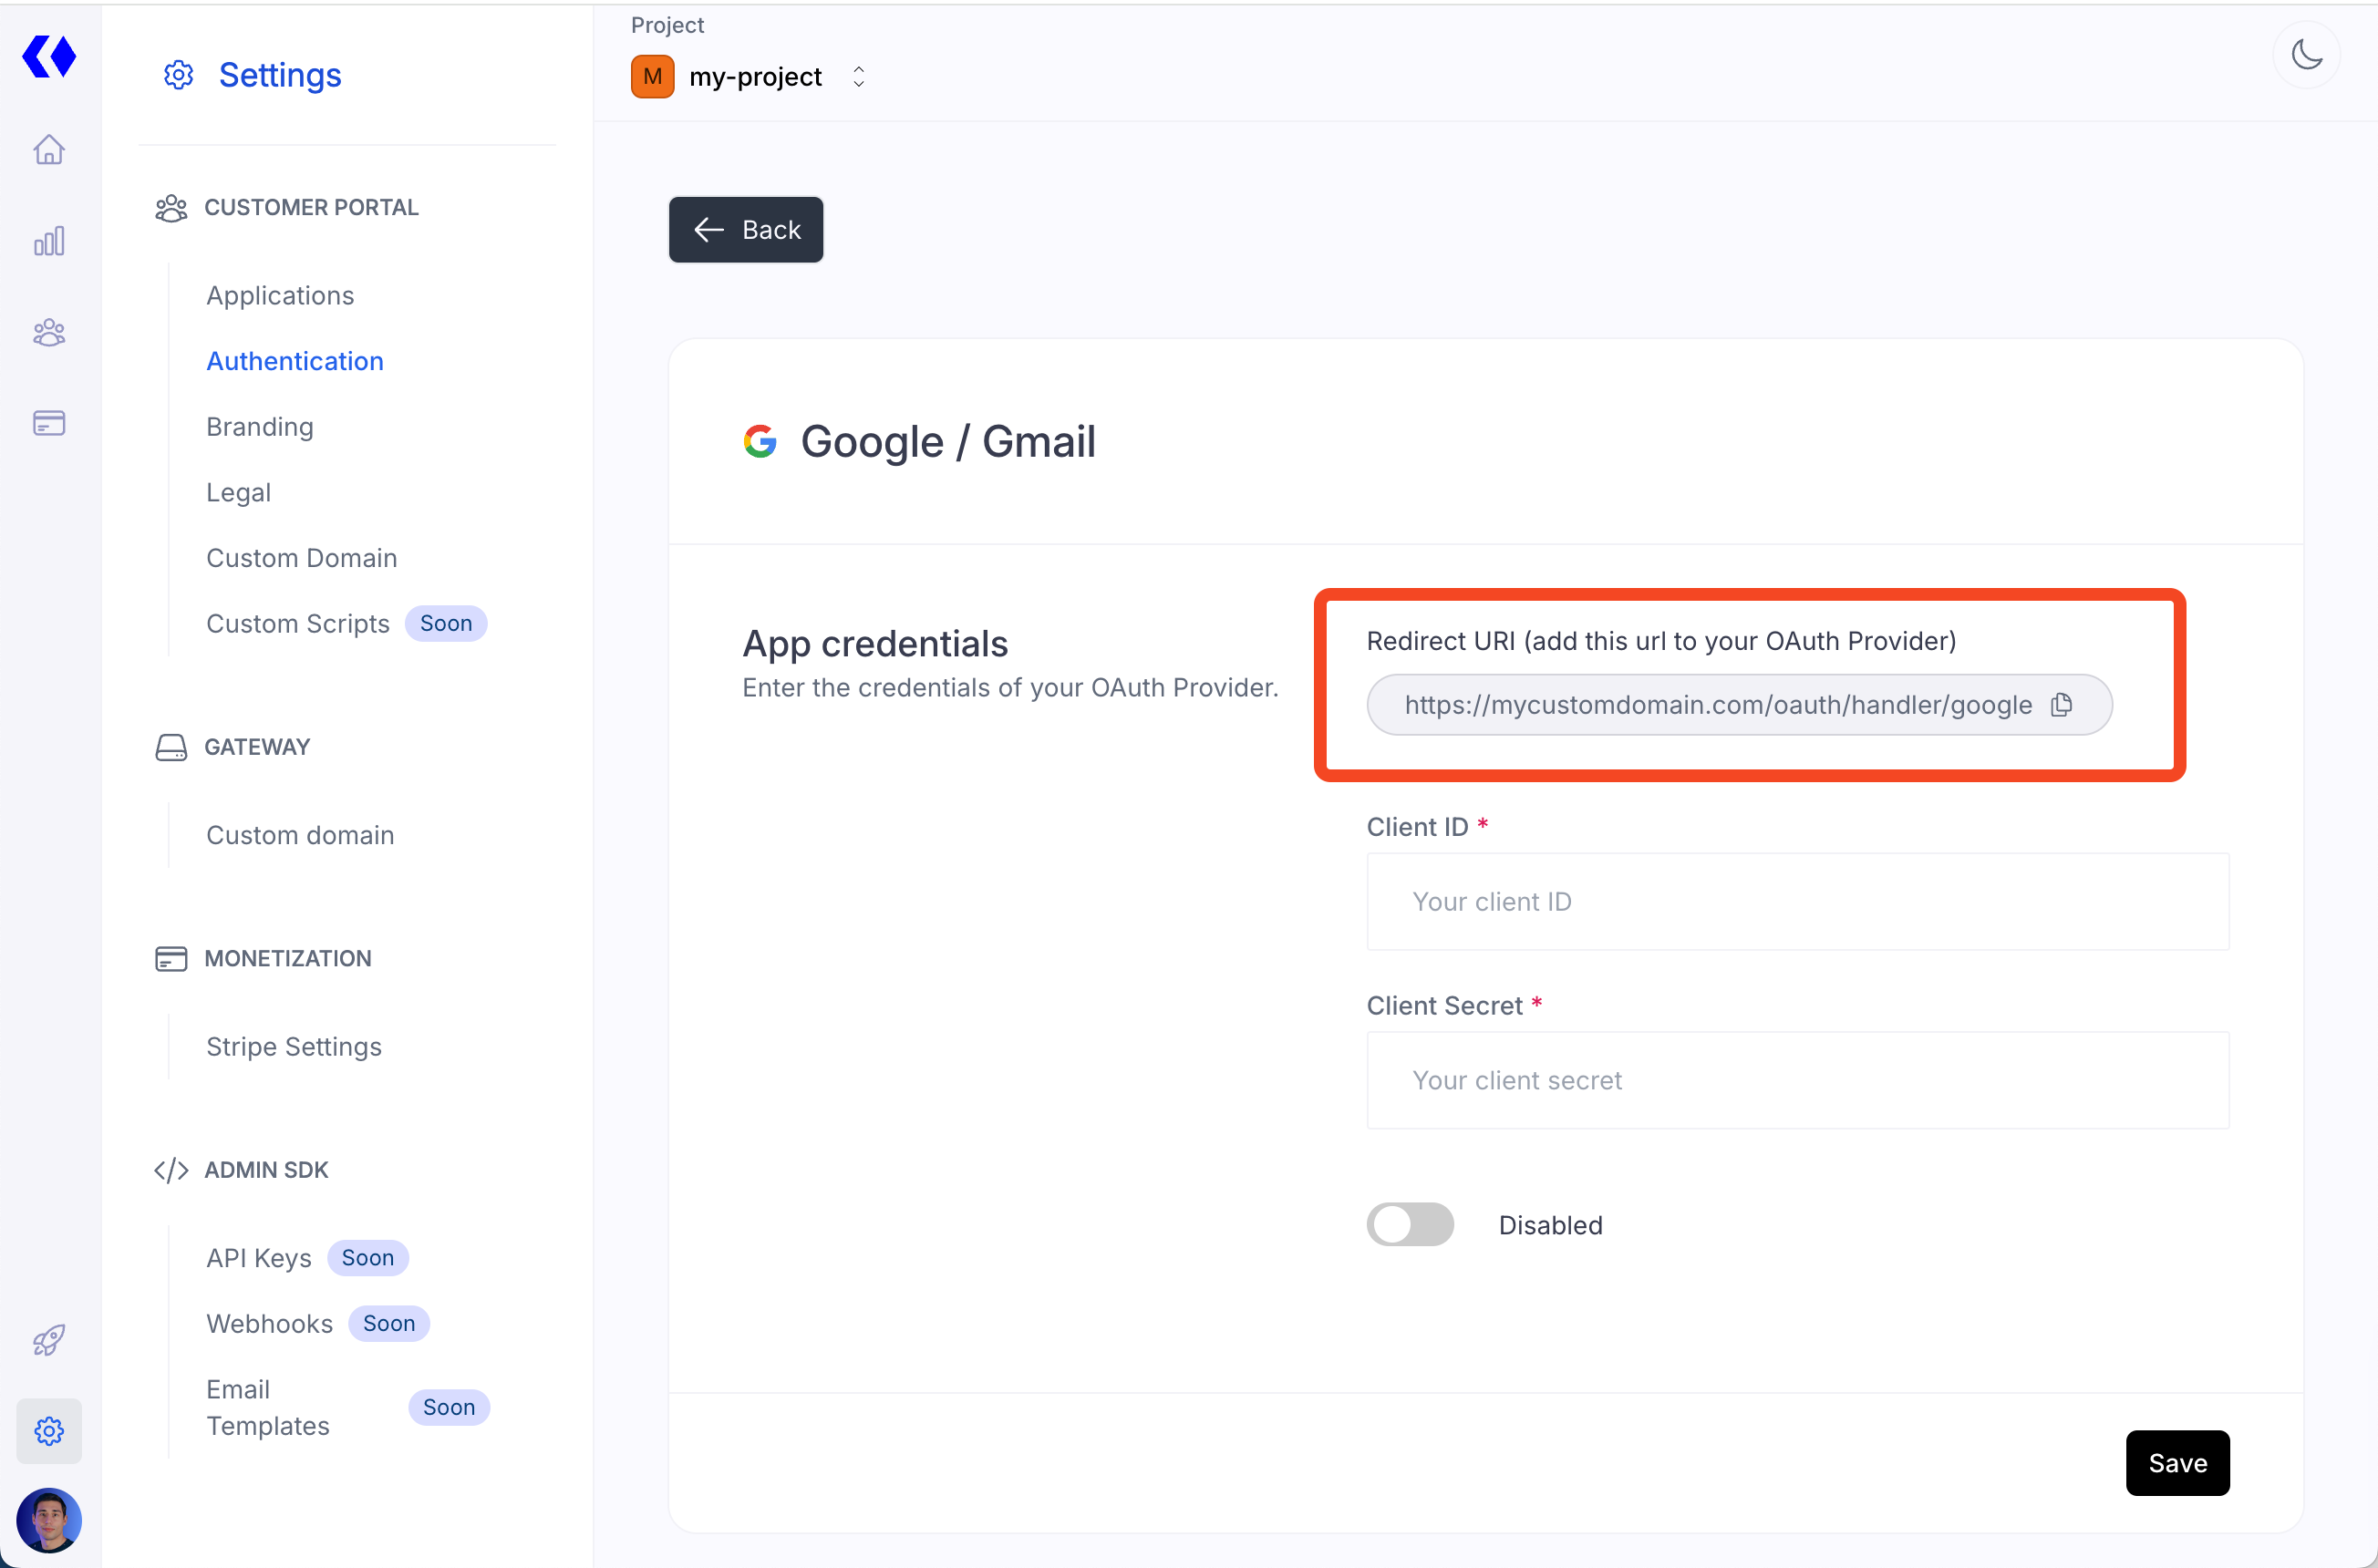
- Navigate to the Authentication section and choose the Google provider.
- Copy the provided Redirect URI. Note this URI will change if you configure a custom domain later.
- Open the Credentials page of your Google Cloud Platform console.
- Click on Create Credentials and select OAuth Client ID.
- When prompted to select an application type, choose Web Application.
- Add the name you want.
- In Authorized redirect URIs enter the redirect URI previously provided by Kobble.
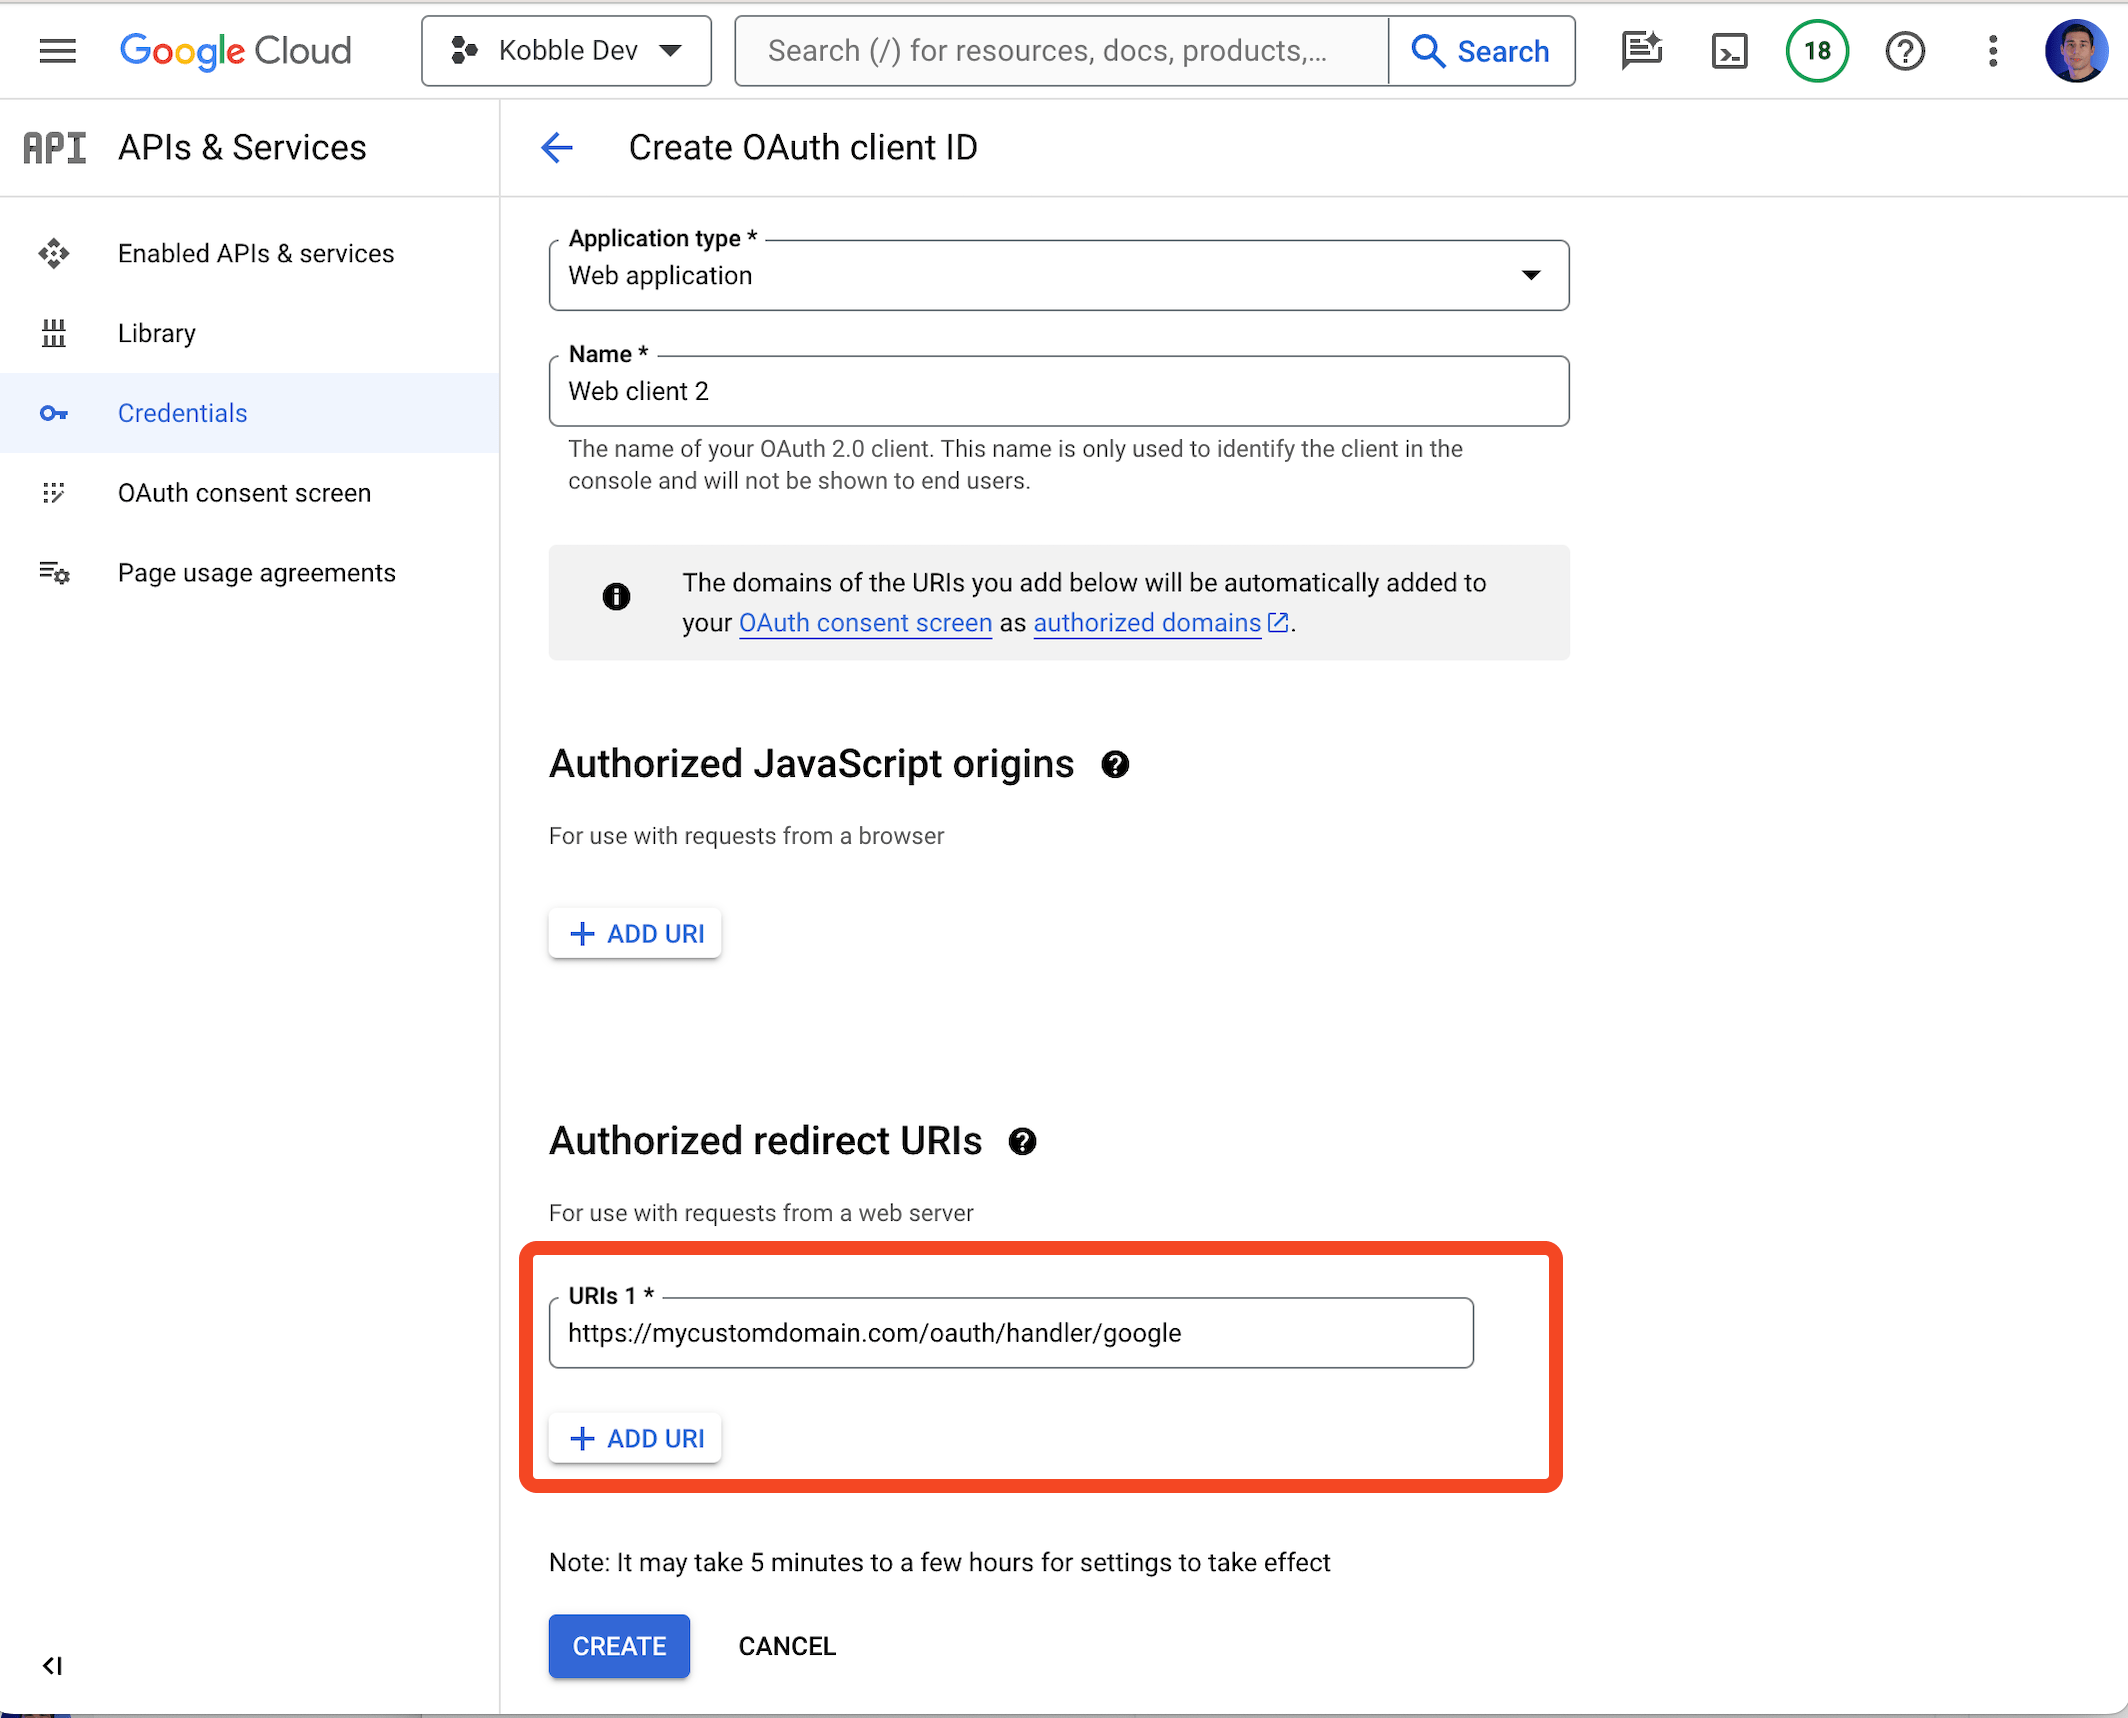
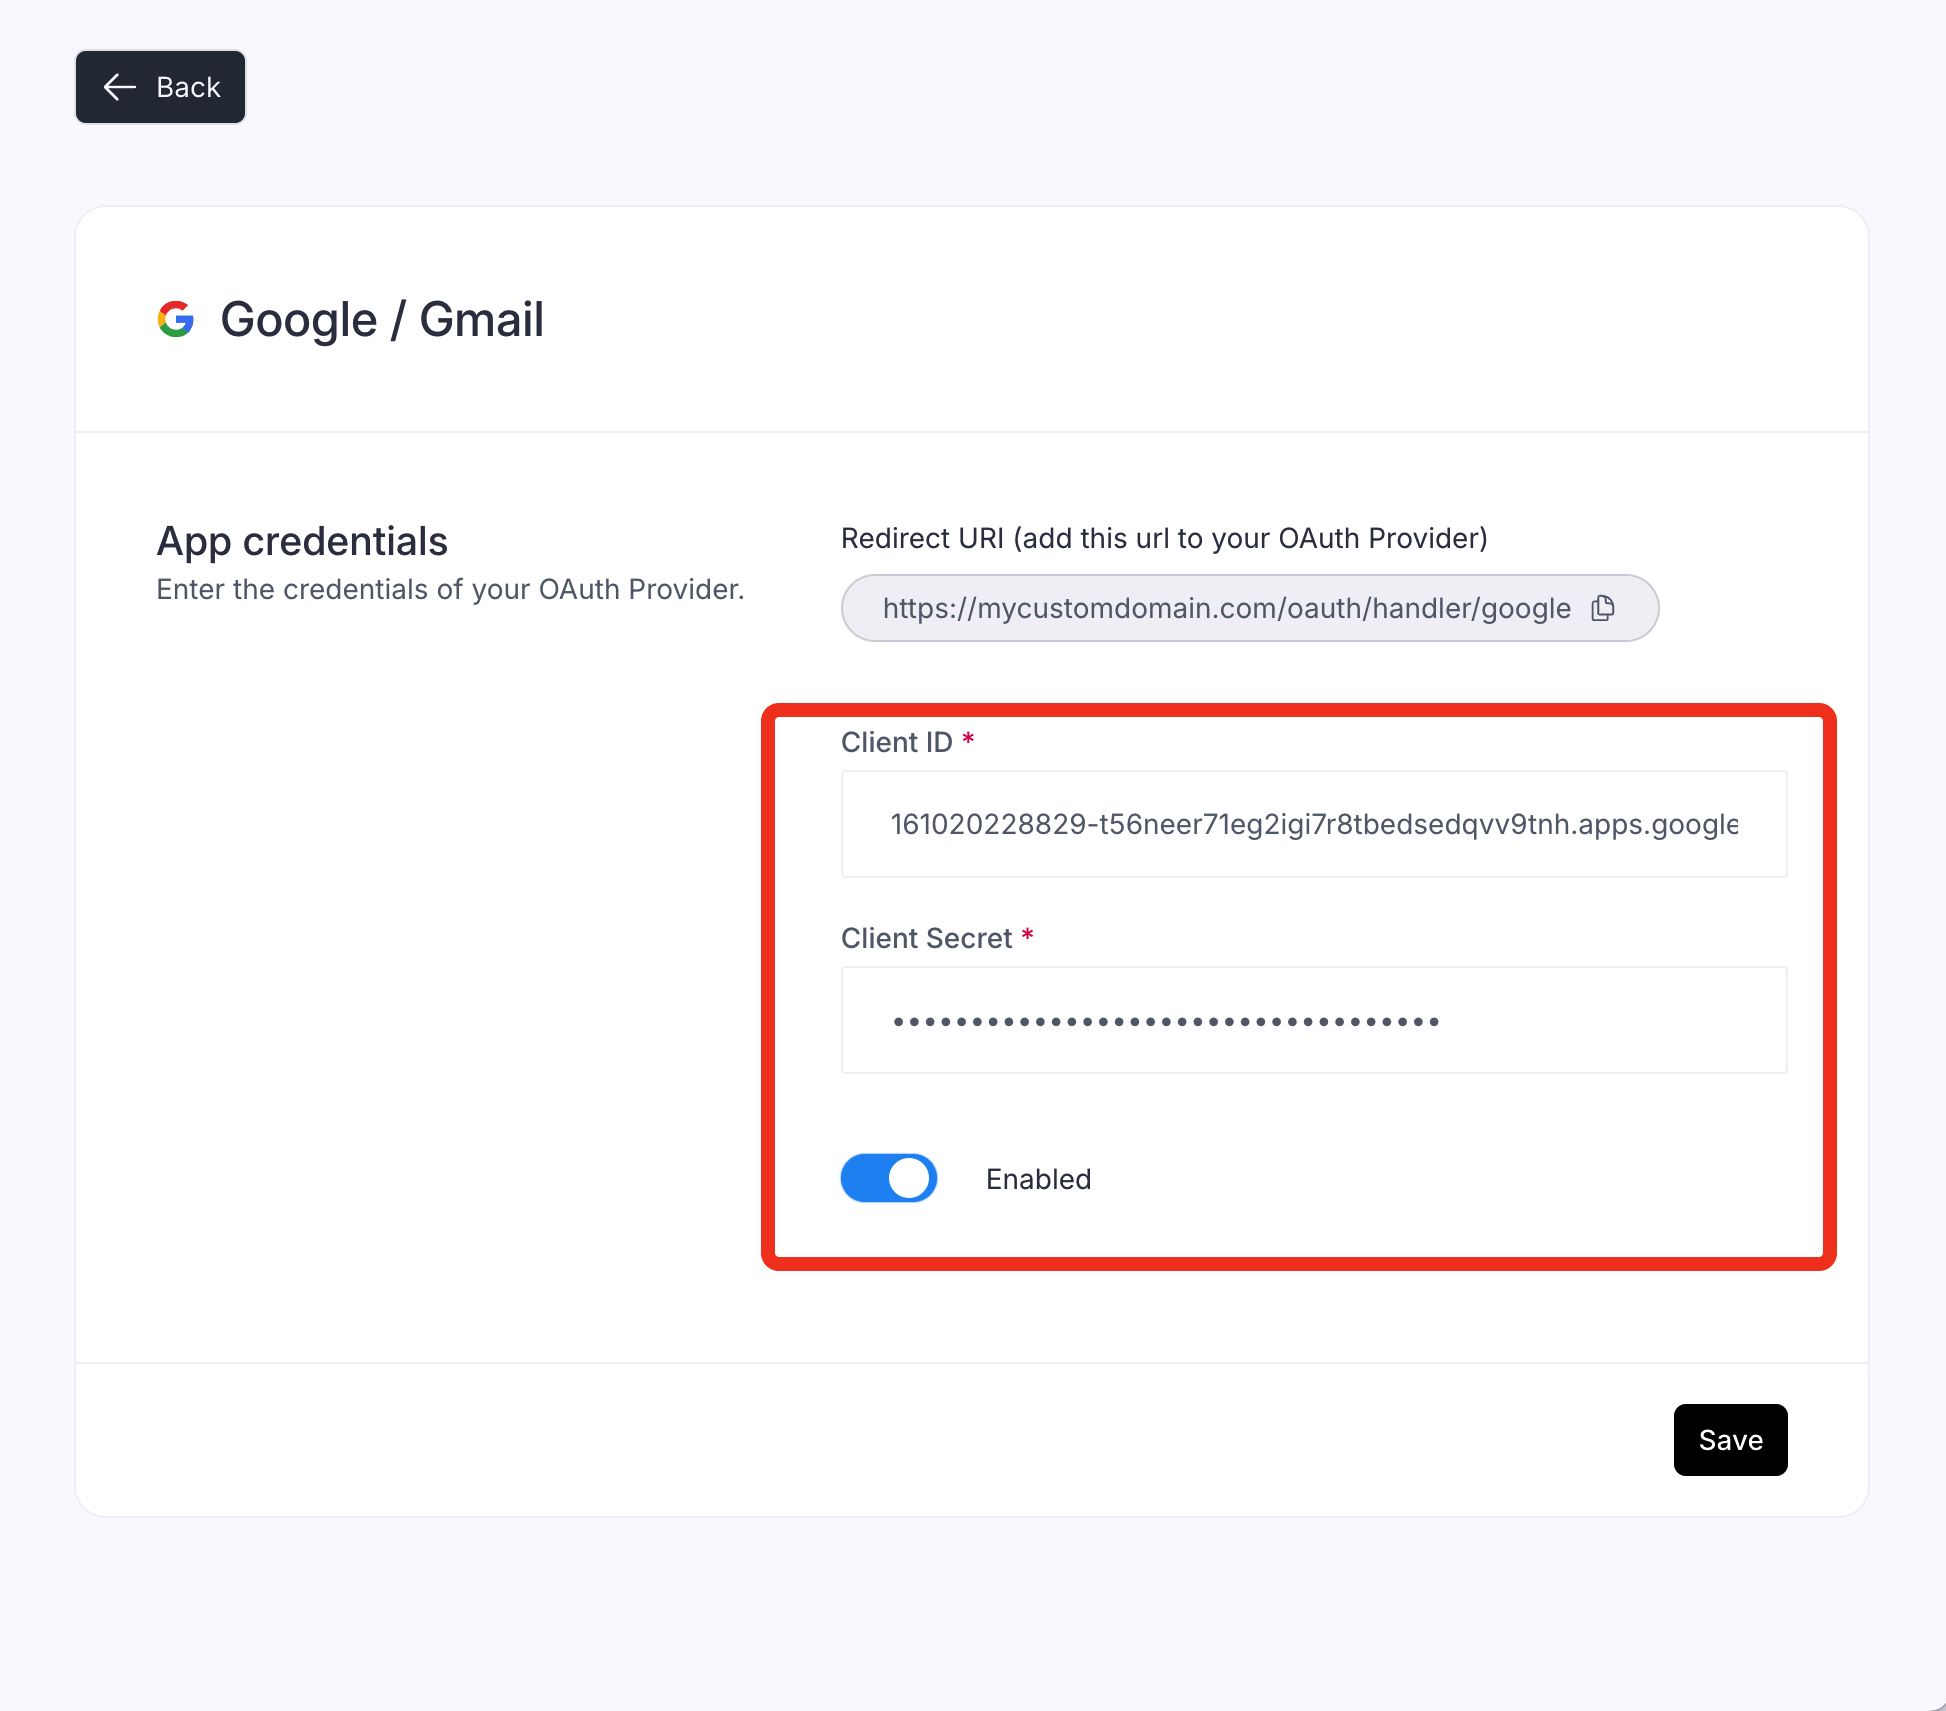
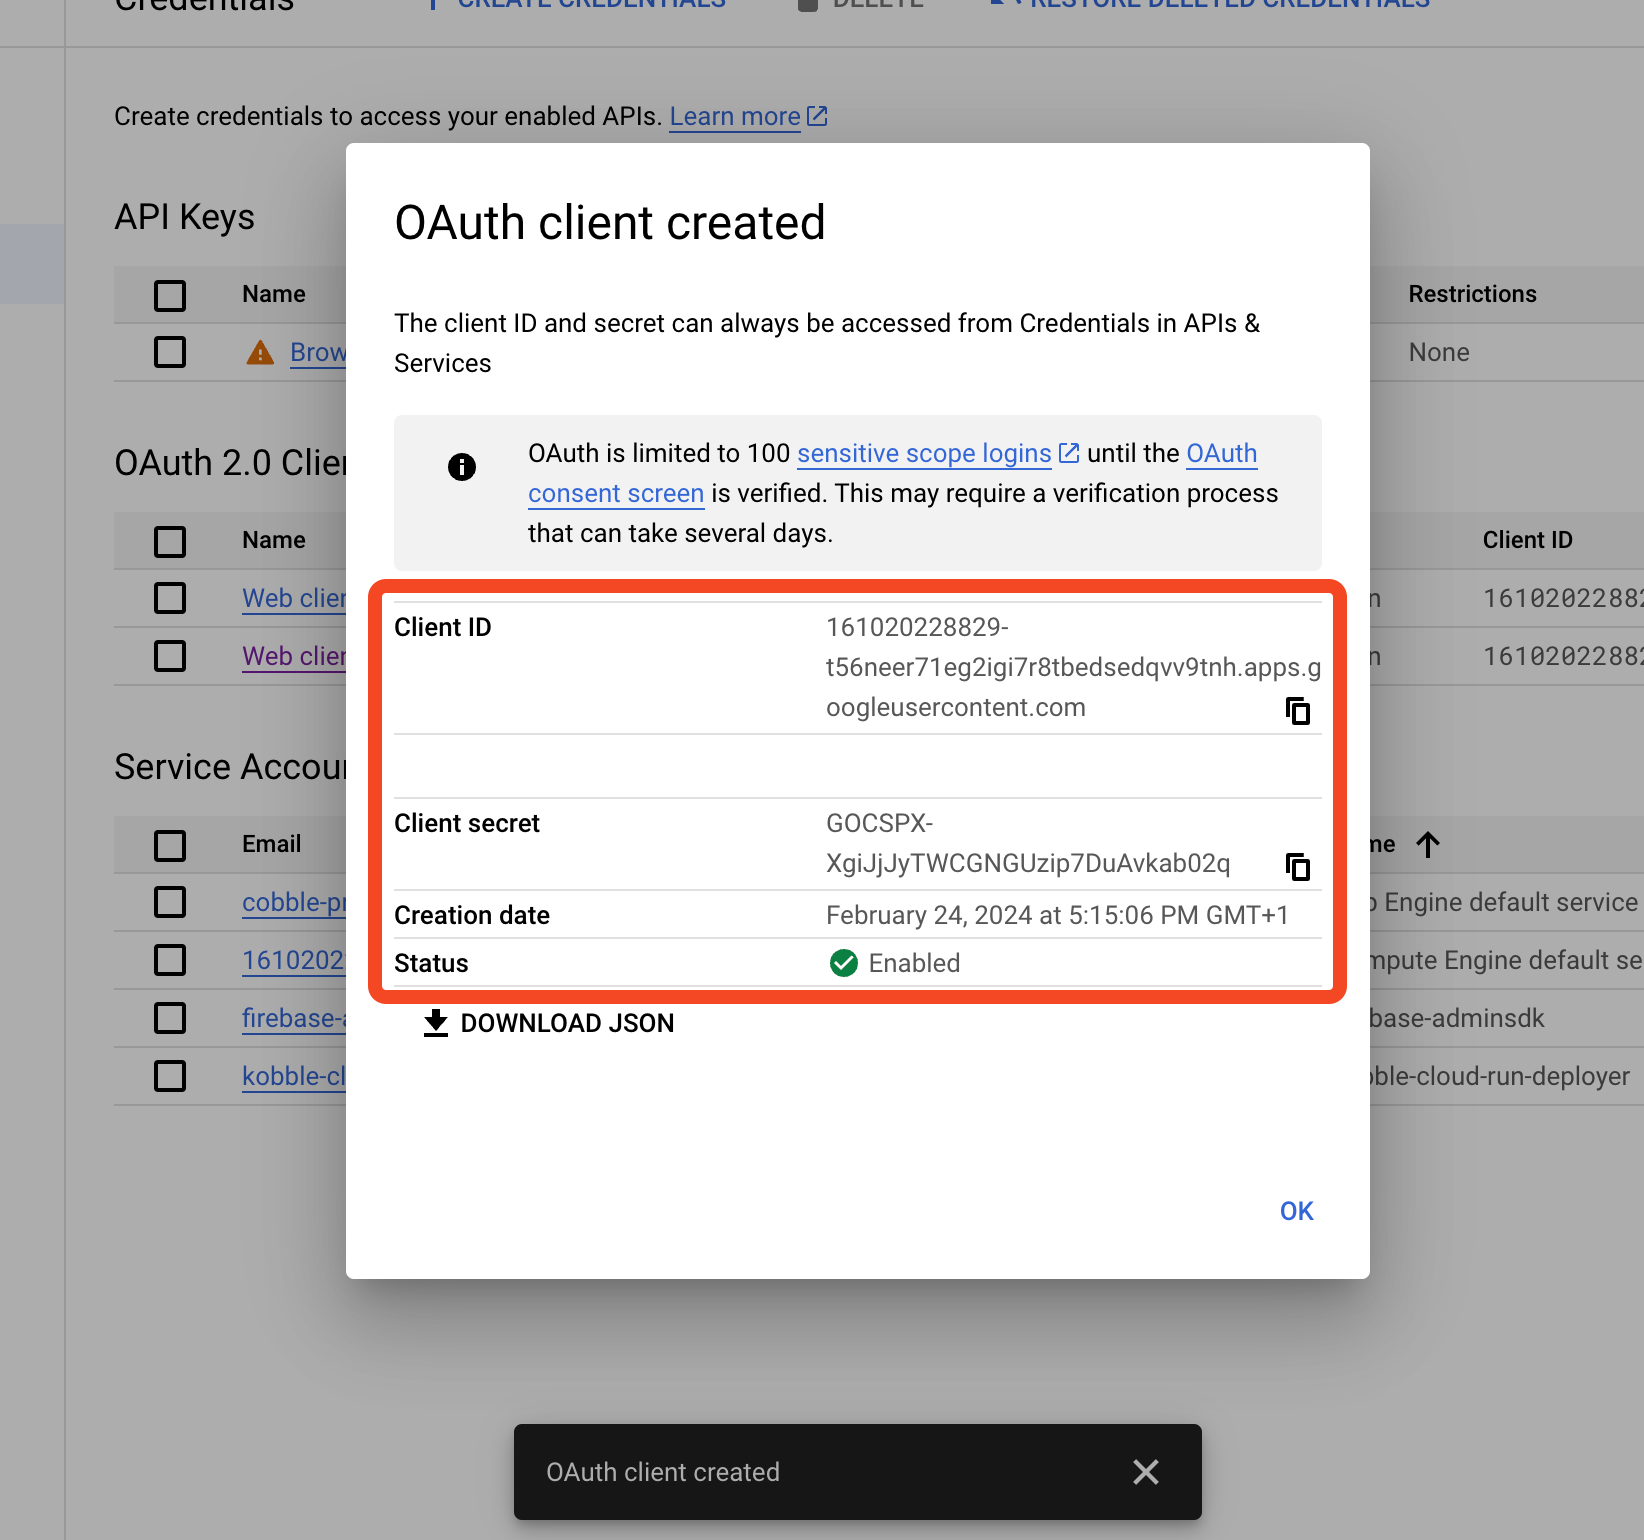
- Click on Create and copy the Client ID and Client Secret provided by Google.
- Paste them into your Kobble settings, turn on the Enabled switch and save.